Converting to an iOS App
<Creating an ipa file>
1 Overview
From this version, games created using RPG Maker MV will now be played using browsers which support HTML5 technology such as WebGL & 2DCanvas, WebAudio and JavaScript. You can also play games made using RPG Maker on iPhone, and iPad with Safari installed that also has HTML5 support.
Rather than explaining how to play using Safari, we will explain in this section how to play your game as an iOS application. Running an HTML5 game as an application using an iOS device is similar to running a game as an iOS application using a browser that supports HTML5. This method of development of running a web application as a native application is known by such names as "Hybrid App," and is popular from the fact that it can be run on cross-platforms.
Browsers which package games as apps are "Browser Engines" which handle the Web display and sounds, and have iOS built-in (called UIWebView). There are several frameworks that connect with browser engines as applications, but we will be using a framework called Apache Cordova here.
Operating Systems
It's possible to run a game on several different platforms as a hybrid app, but you will essentially need a Mac PC with OS X installed as your environment for creating iOS apps. Here we will be using OS X 10.10. Additionally, the computer used to do your work will be referred to as "Mac".
2 Prepare the Packaging Environment
Installing games created using RPG Maker on iOS will require creating an ipa file. An ipa file is the installer for iOS apps and its extension is ipa. This is compressed in a ZIP format, and contains various necessary files for running the application. We will refer to creating the ipa file here as "Packaging".
Also, an Internet connection is required to download some of the necessary developer tools.
Put simply, Node.js provides an environment where you can run JavaScript outside of a browser. Cordova is provided as a Node.js package so let's go ahead and install Node.js first.
2-1-1 Installing and Checking Node.js
Click [INSTALL] found on https://nodejs.org/ and download the installer.
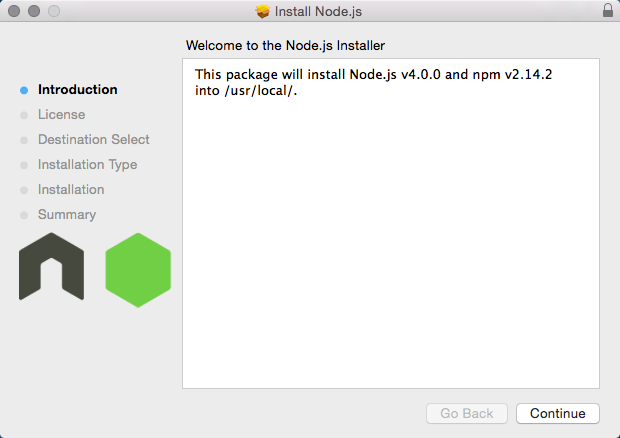
Run the installer. When prompted for the administrator password, enter administrator password for your Mac and run the installer. The installation is complete when this finishes.
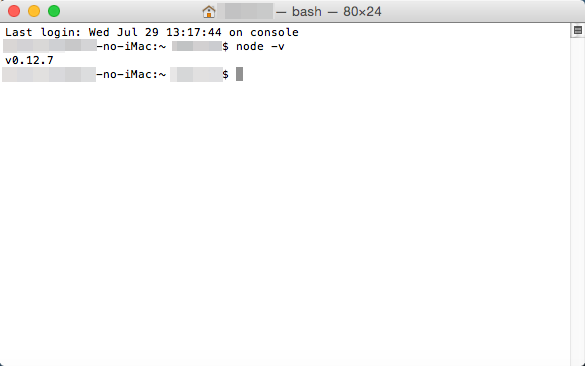
Confirm the Node.js installation using the terminal. The terminal can be found in Applications → Utilities. After the terminal starts up, enter "node -v" and press the return key. If the version you installed is displayed, there is no problem.
$ node -v
2-1-2 Installing Cordova
Cordova is provided as a Node.js package. The npm command which is a package management tool is provided in Node.js.
Enter "sudo npm install cordova -g" into the terminal and install Cordova. "sudo" is used to run processes and applications as an administrator on Macs. Run the "npm" command here as an administrator. The "-g" option is an option which is used so that you can use Cordova in a global environment, and using this allows you to use the inside of any Mac folder.
You will be asked for the administrator password so enter the password and run the installation.
$ sudo npm install cordova -g

Confirm your version of Cordova. Enter "cordova -v" into the terminal and press the return key. If the version of Cordova is displayed, that means there is no problem.
$ cordova -v

2-2 Xcode Installation and Setup
There are various required files included in the ipa file which are needed to run your application on an iOS device. In order to allocate all those files into one file, there is an application called Xcode for the Mac available. Tools which allow you to do true development are also included with Xcode.
2-2-1 Xcode Installation, Setup
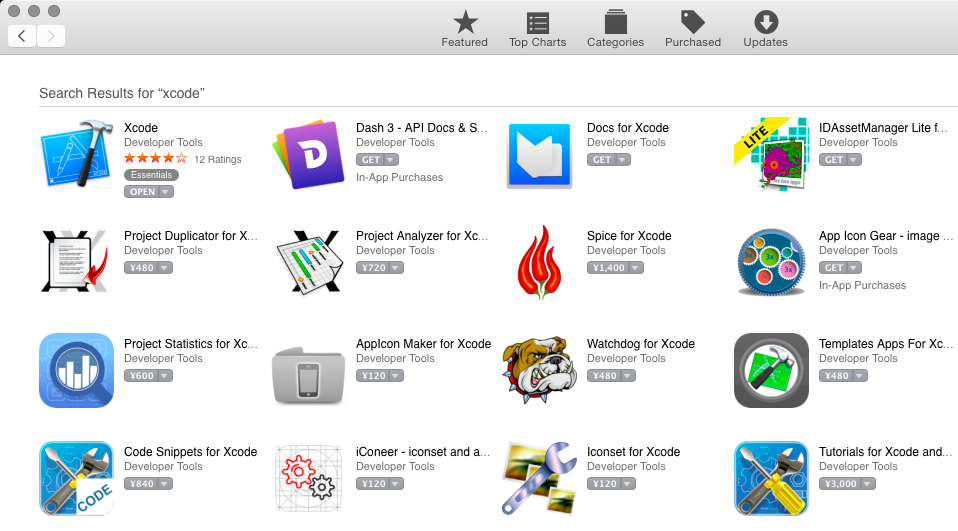
You can get Xcode for free from the App Store.
The newest version of Xcode is 6.4 as of August 2015.
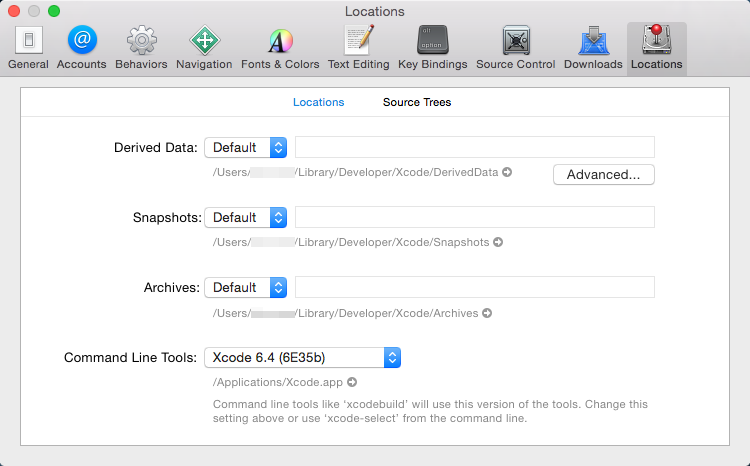
Xcode command line tools are a group of commands for development that you can use in the terminal.
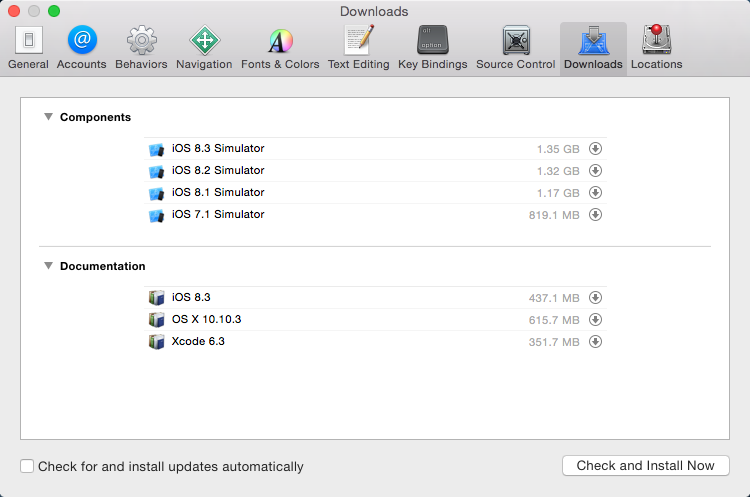
Check that command line tools are useable in the [Locations] tab under [Preferences] in [Xcode] found in the menu. If you do not currently have the command line tools you can download them from the [Downloads] tab on the left.
2-3 Installing ios-sim
Here we will install the ios-sim which allows you to easily use the iOS simulator from Cordova. This can be downloaded using Node.js.
Enter "sudo npm install ios-sim -g" into the terminal and install the simulator.
If the version of the simulator is displayed when you enter "ios-sim --version", that means there is no problem.
$ sudo npm install ios-sim -g
$ ios-sim --version
3 Deploying Games Using RPG Maker
Here we will export the necessary game data, assets and game engine to a package from RPG Maker. Select [Deployment...] from the File Menu and the deployment dialog will appear. If you select [Android / iOS] and export, all the files needed for iOS packaging will be placed in the selected folder.
In this example, we deployed to the desktop.
4 Packaging
Packaging refers to creating the ipa file which you allows you to install applications to an iOS device.
4-1 Creating an Xcode Project
Let's create an Xcode project using Cordova. In the end, we will be exporting an ipa file using Xcode.
4-1-1 Creating a Cordova Template
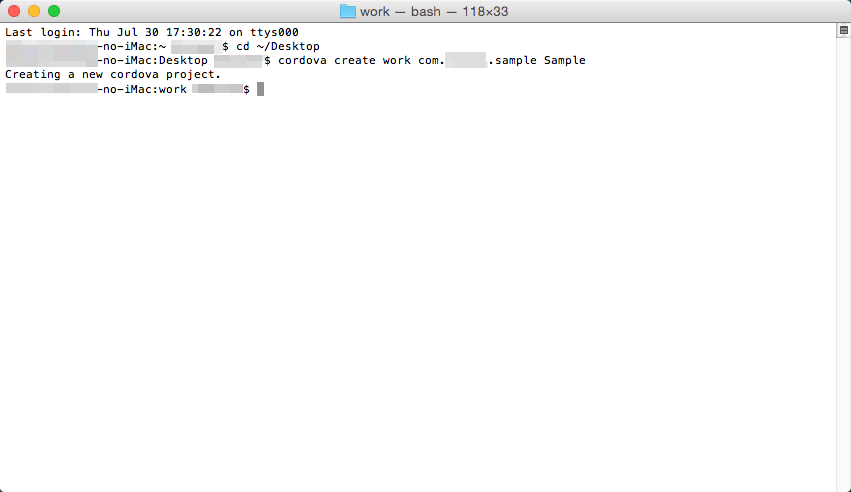
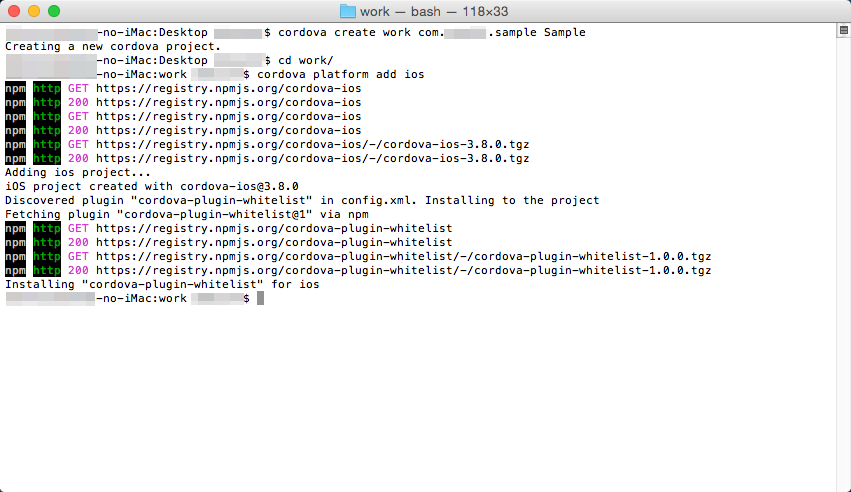
First, we will create a template using the "create" option which is a Cordova command. Below is an example of a command that you would use in the terminal.
$ cordova create ~/Desktop/work com.example.sample Sample
In the example above, we are creating a folder where you will work from called "work" on the desktop. The folder will be the template, the package name will be set to "com.example.sample" and the app name will be set as "Sample".
*When actually setting the package name, you cannot use "com.example".
4-1-2 Adding iOS Platforms
We will add iOS files that you will use to a template using Cordova. Enter "cd ~/Desktop/work" into the terminal to move to the "work" folder that was created earlier. After moving to the folder, type "cordova platform add ios" into the terminal and press the return key. Doing this will create the necessary files for running on iOS.
$ cd ~/Desktop/work
$ cordova platform add ios
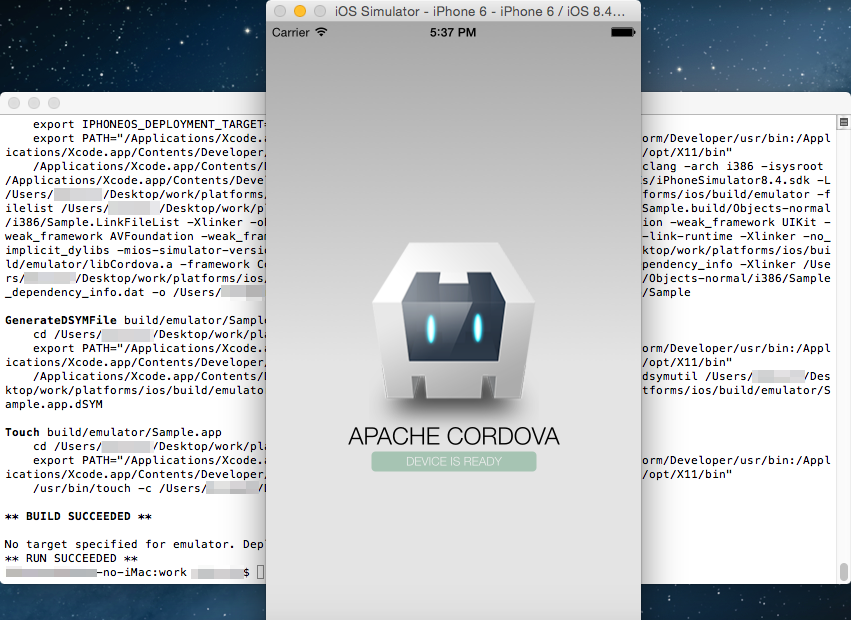
Use ios-sim to confirm everything you have done up until now using an iOS simulator.
Enter "cordova emulate ios" into the terminal and press the return key. When the build finishes, the iOS simulator will automatically start up and the template screen will be displayed.
$ cordova emulate ios
4-1-3 Copying a Deployed Game
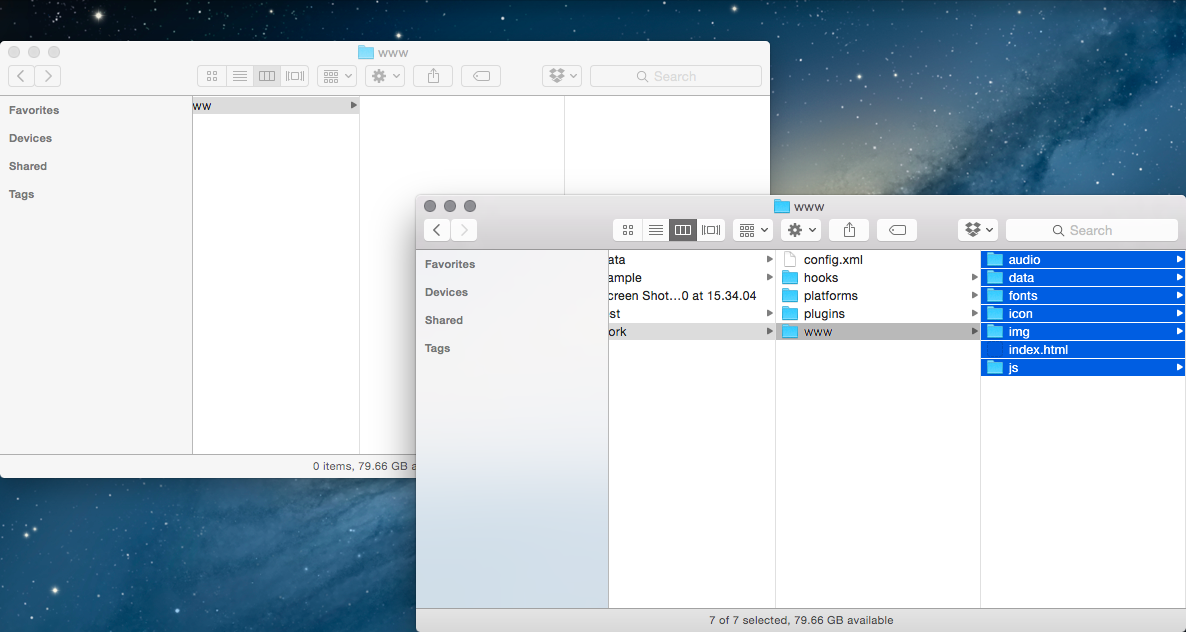
Here we will copy the deployed game data and other files to the "www" folder found inside the "work" folder. Delete the entire contents of the already existing "work/www" folder, leaving it empty.
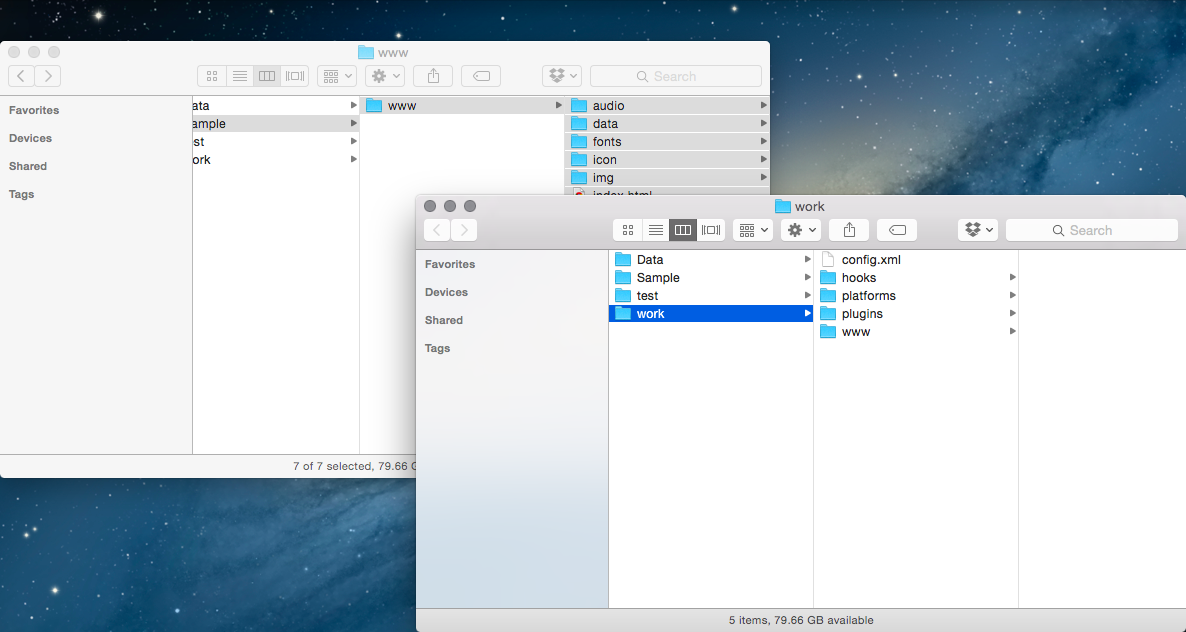
Copy all the files inside the "www" folder found inside the deployed folder to the "work/www" folder.
4-1-4 Editing the index.html File
Let's make adjustments to the game's HTML for Cordova.
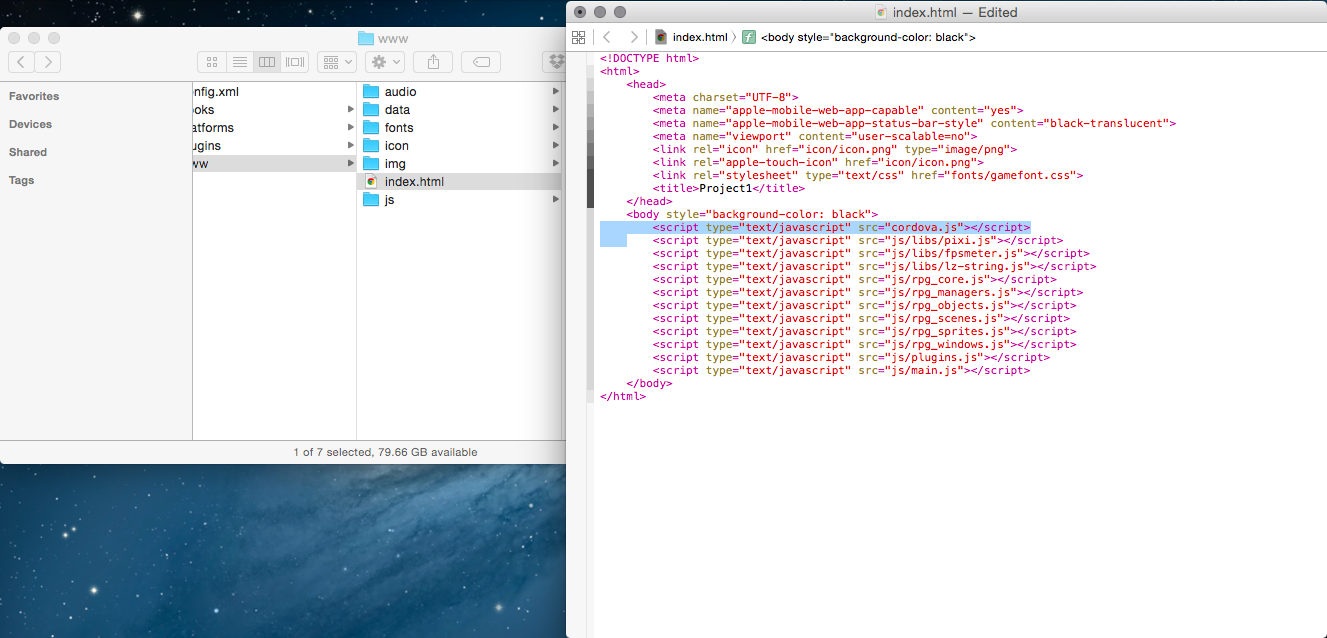
Open the "work/www/index.html" file using your favorite text editor.
You will be adding one row, which is the below tag that will be added below <body style="background-color: black"> tag.
<script type="text/javascript" src="cordova.js"></script>
4-1-5 Editing the config.xml File
We will make some adjustments to the config.xml file that configures the behavior of your game app. RPG Maker is optimized for holding the device sideways, so we will set the screen's orientation to landscape.
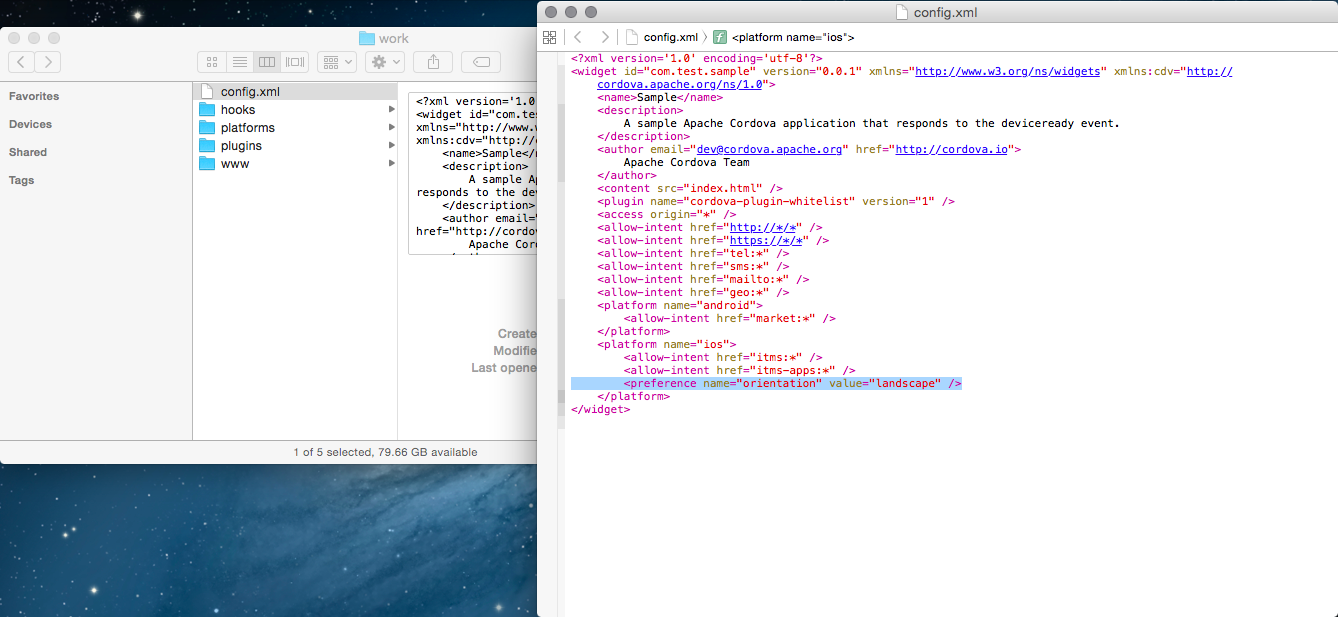
Open the "work/config.xml" file using your favorite text editor.
Add the below tag inside the <platform name ="ios"> tag.
<preference name="orientation" value="landscape" />
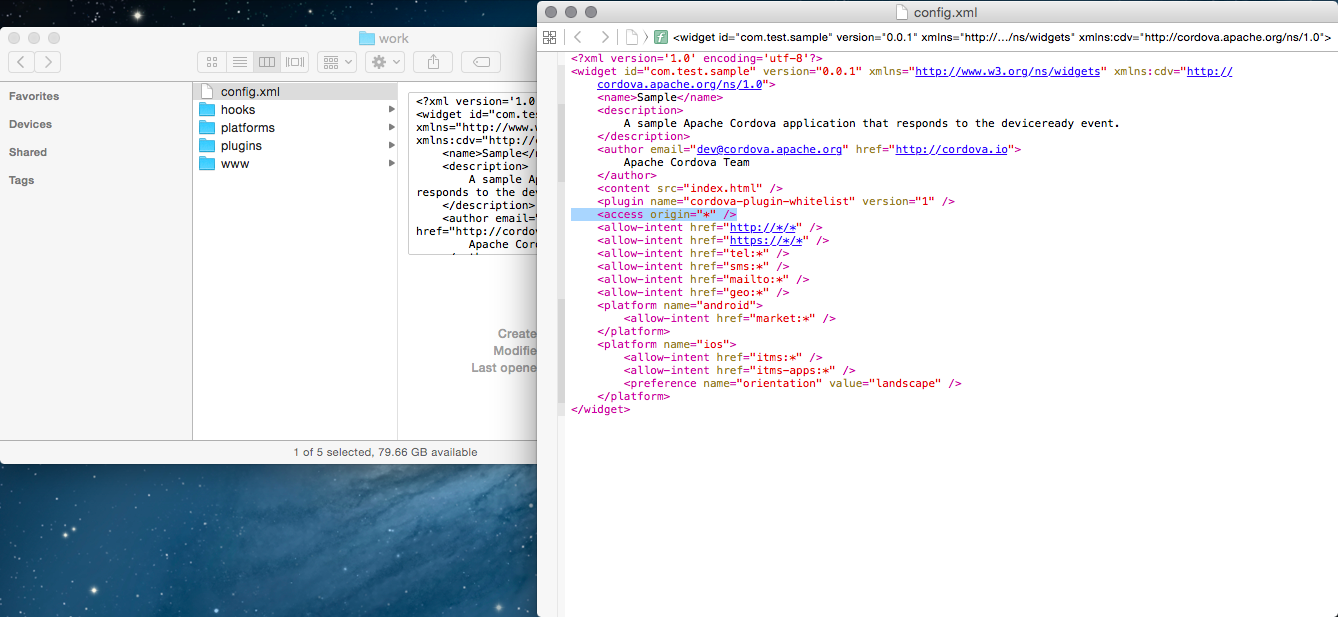
Additionally, there is also a row which has the tag <access origin="*">, which sets the application allow access to external HTML from the game's HTML.
This is not needed so go ahead and delete this line.
4-1-6 Build
We've finished up the configuration so let's make a build.
Enter "cordova build" into the terminal and press the return key. After a while, your build will be complete.
$ cordova build
At this point, all of the settings necessary for running your game are now complete. Let's see if the app works using an emulator.
Enter "cordova emulate ios" in the terminal just as you did before.
$ cordova emulate ios
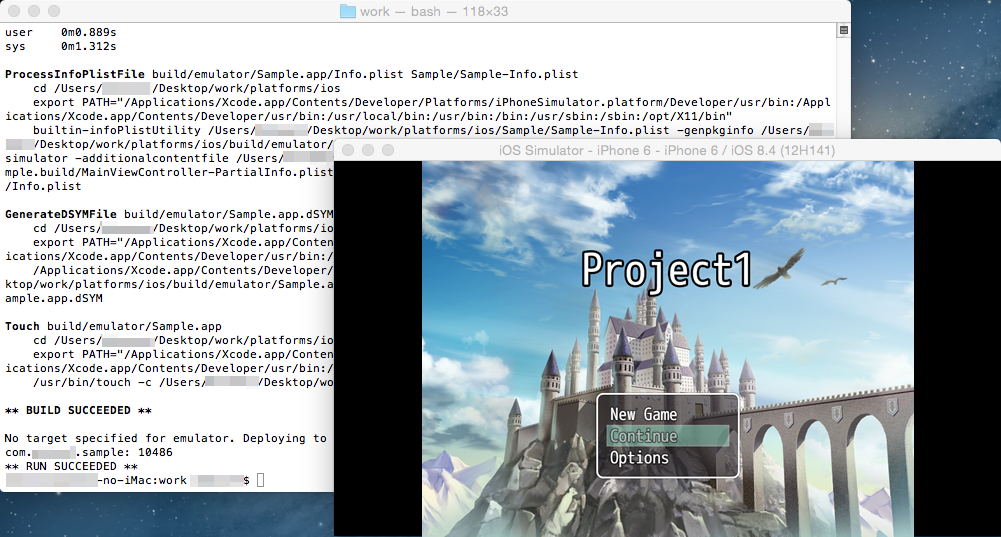
The game has started up.
4-1-7 Changing Icons
The app icon can be found in "work/platforms/ios/<App Name>/Resources/icons".
If you are using your own original files, overwrite the same files using files of the same size and with the same name.
4-2 Creating a Provisioning Profile
To create an ipa file which can be installed on the actual iOS device, you will need a "provisioning profile" which is a file used for identifying applications.
To get a provisioning profile, you will need to register on Apple's [Apple Developer Program] (paid service).
Also, we will be calling the series of actions such as the implementation of the provisioning file into a package as "signing". For signing, you will need files such as a key file and certificate files that certify the key file.
*The Apple Developer Program site is frequently updated so the method of acquiring provisioning files may change. If for some reason you have trouble completing the necessary actions or if there is anything you would like to know, please send an inquiry on Apple Developer Program.
4-2-1 Creating a key file and Certificate Request & Registration
The certificate registration that you will be doing here is only required if you have not done this yet.
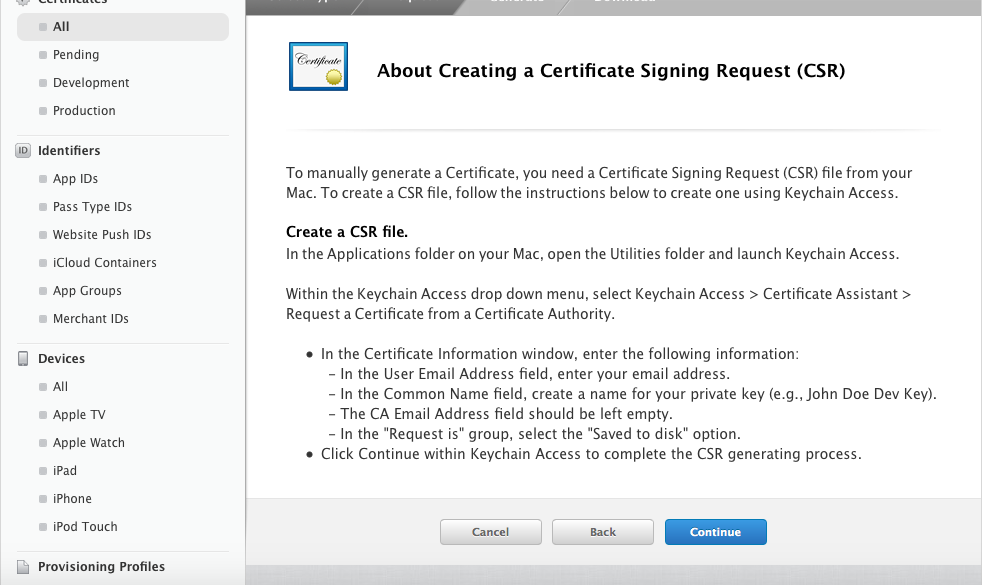
First, we will create a key file and request a certificate for that key file. We will use "Keychain Access" for requesting a certificate.
Keychain Access is located in [Applications] → [Utilities].
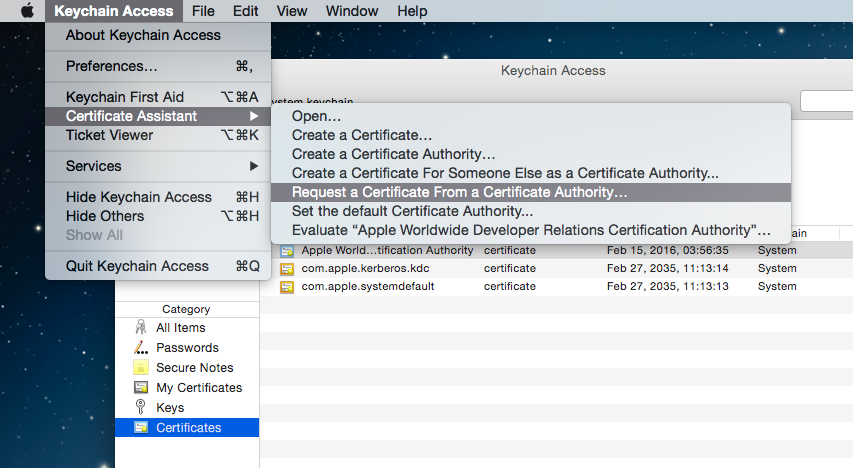
Run Keychain Access, and select [Request a Certificate From a Certificate Authority] in [Certification Assistant] found under [Keychain Access] in the menu.
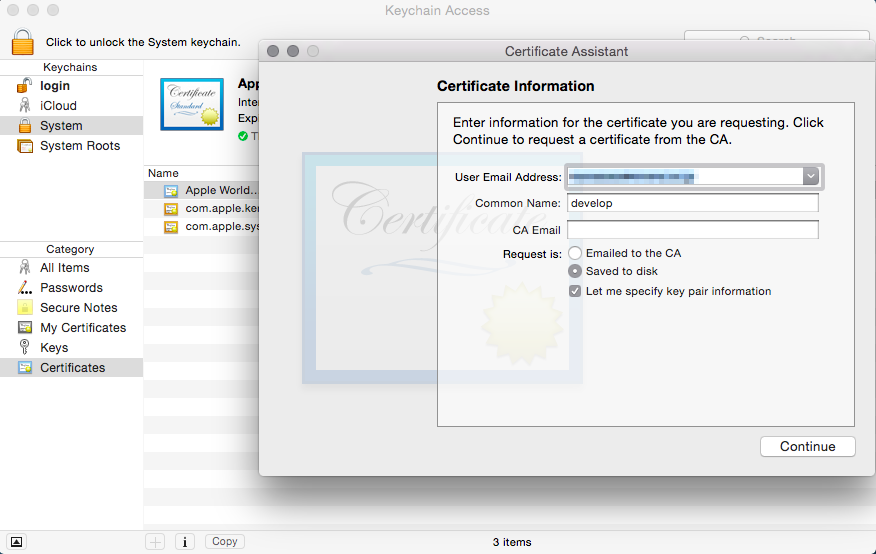
For the user e-mail address, use the e-mail address that you used to register on Apple Developer Program, and choose a name for the common name that is easy to understand. Set the request process to [Saved to disk] and check [Let me specify key pair information].
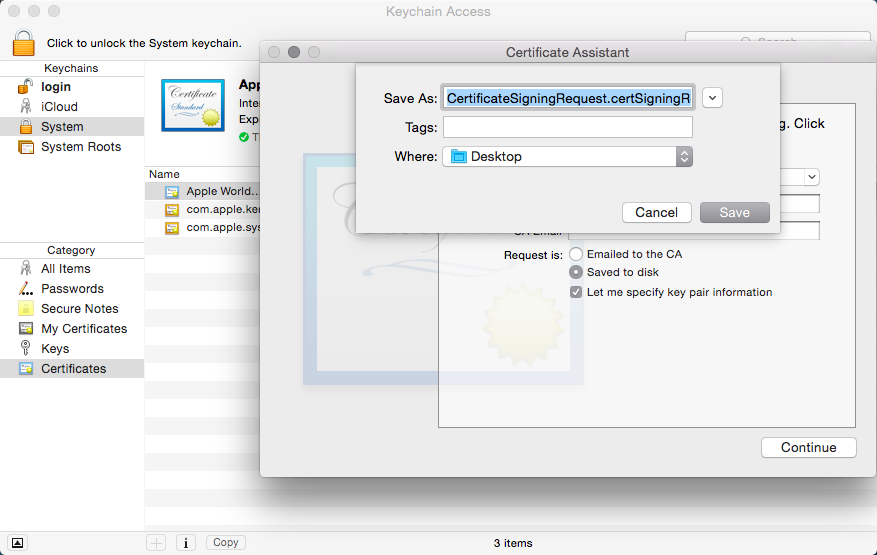
Save the request file.
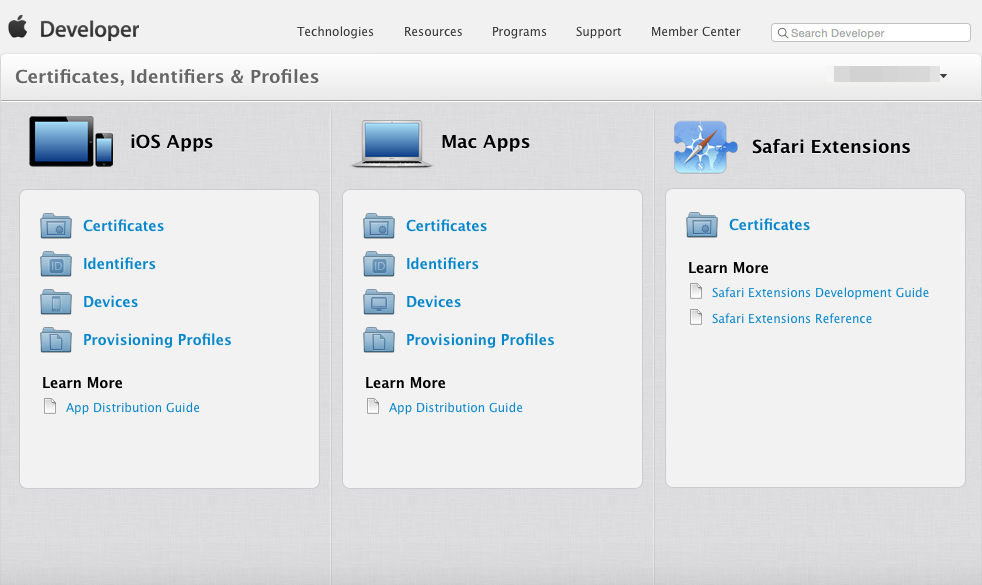
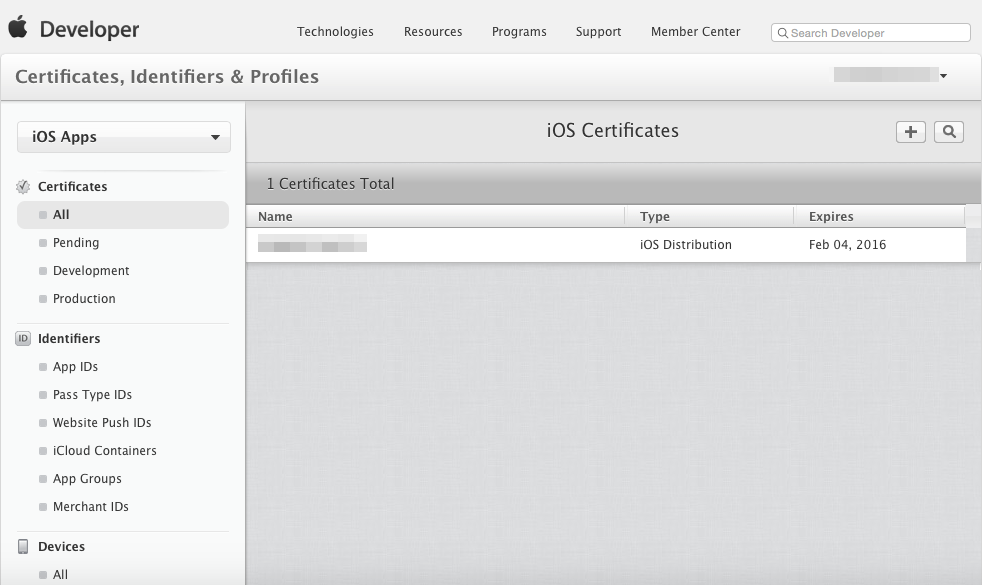
Select [Certificates, Identifiers & Profiles] from the Apple Developer Program member center.

You will move to the certificate management screen when you select [Certificates]. Select [All] in the left pane, and press the [+] button in the upper right.
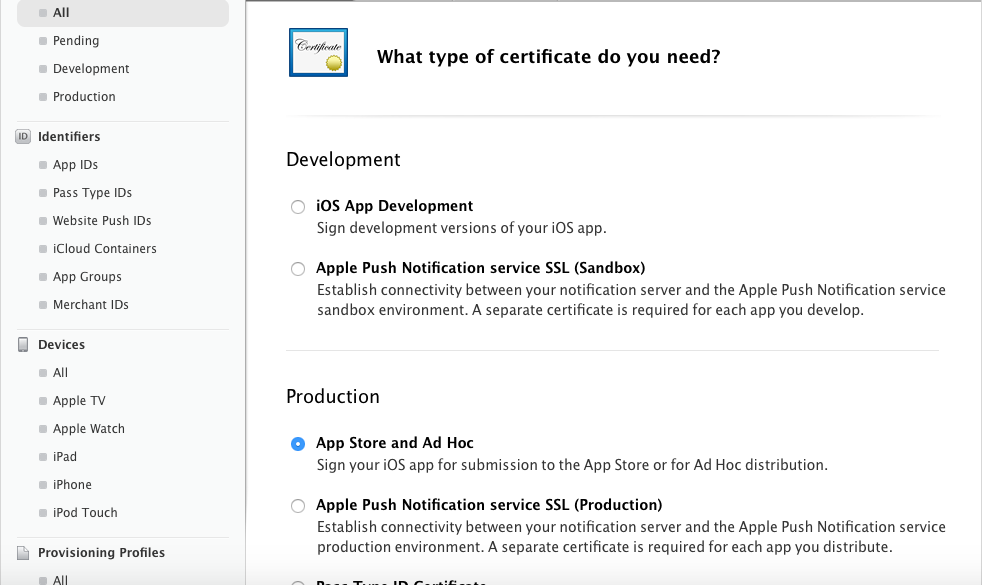
Select [App Store and Ad Hoc] for the certificate type.
Proceed to the next screen.
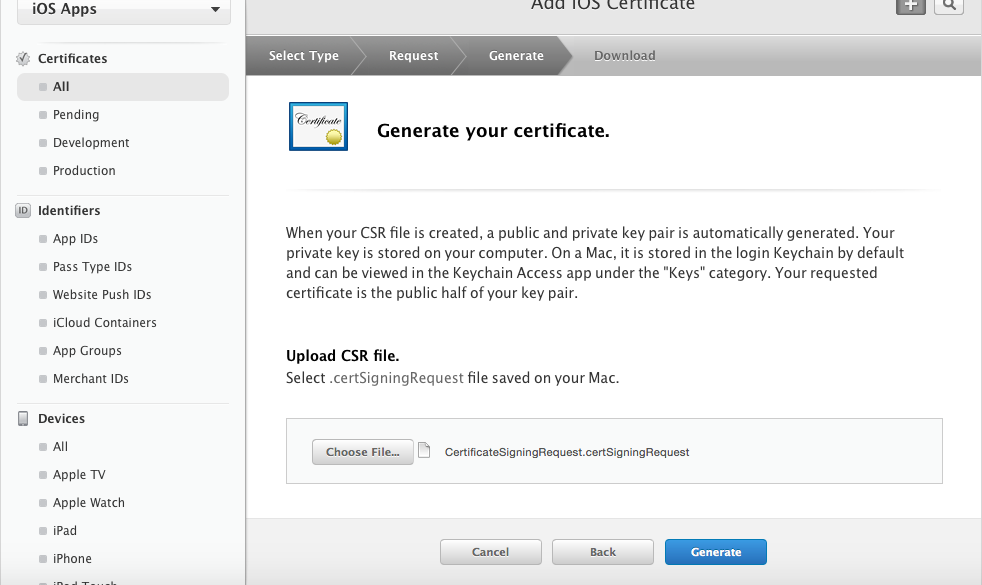
In the request certificate selection screen, select the request file which you made using Keychain Access.
The certificate has now been issued. Download the certificate.
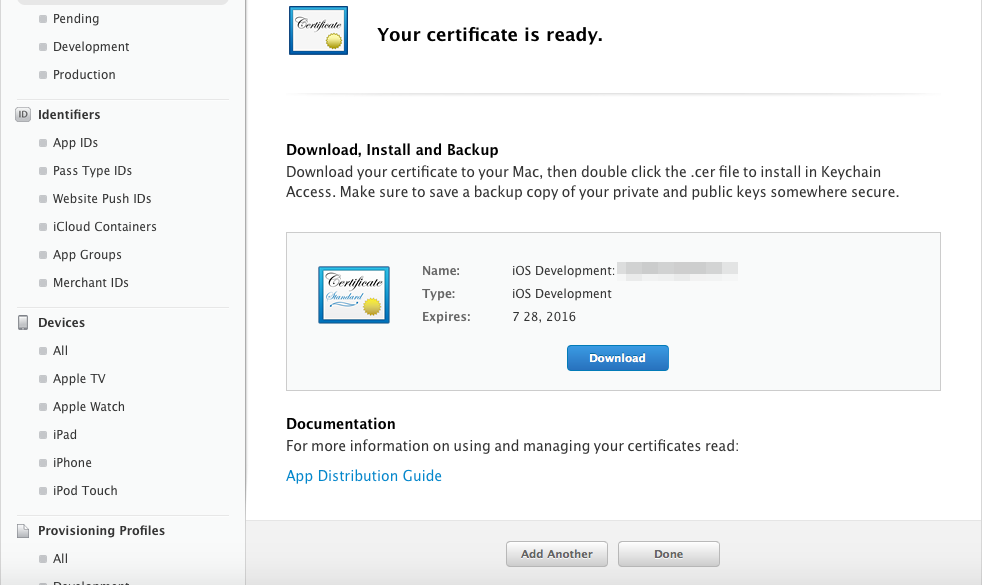
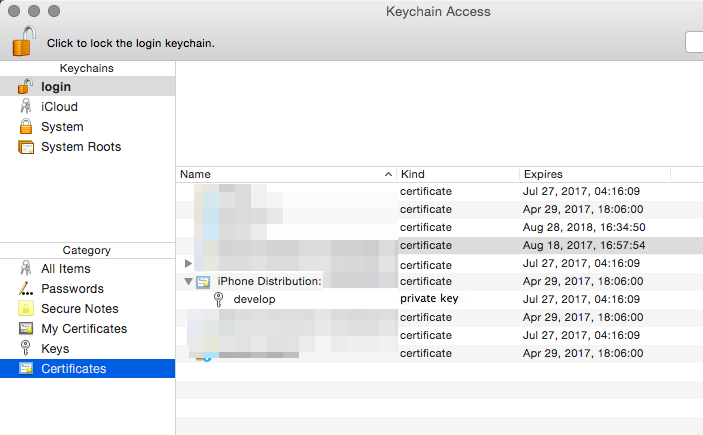
If you double-click the downloaded certificate, it will be loaded into Keychain Access.
4-2-2 Creating an App ID
Next, we will create an App ID which will be used to make the package.
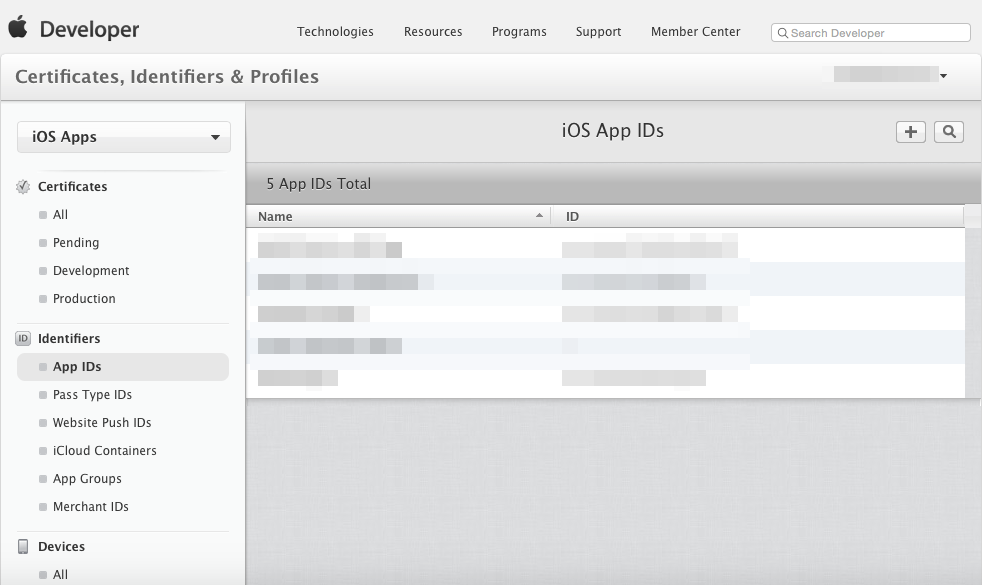
This will be carried out in the [Identifiers] section in the Apple Developer Program site which you used earlier.
Select [App IDs] under [Identifiers] in the left pane, and press the [+] button in the upper right.
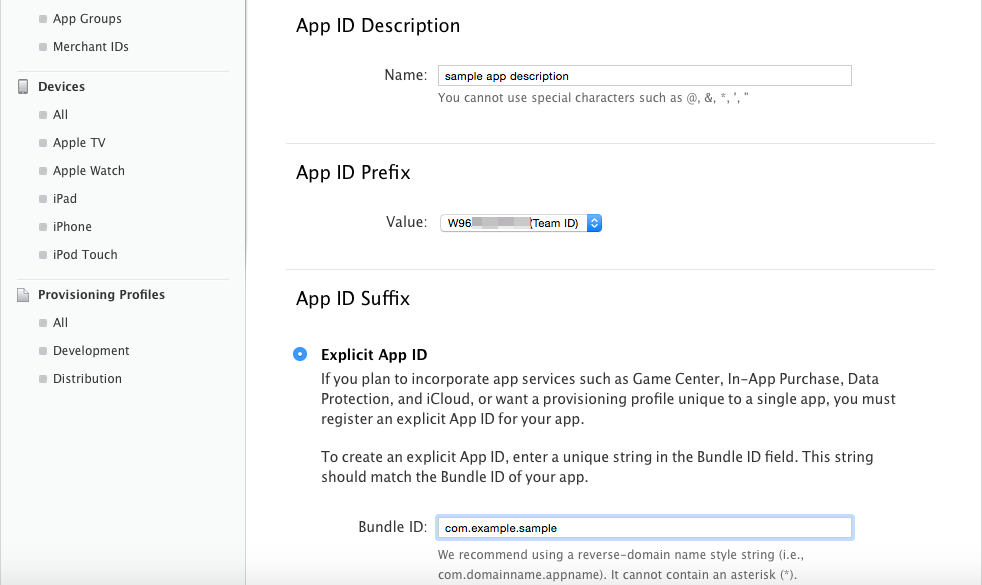
Enter a name that is easy to remember in the [Name] section under [App ID Description].
Enter the [Bundle ID] in the [Explicit App ID] section under [App ID Suffix]. Just like the provided example, the domain name is used in reverse with the top level domain ("com" in the example) and is connected using a ".". Following at the end is your game's name ("sample" in the example).
*Please keep in mind that you cannot actually use example.com.
Example:
When the domain that you own is [example.com] and your game's name is [sample], you would write:
com.example.sample.
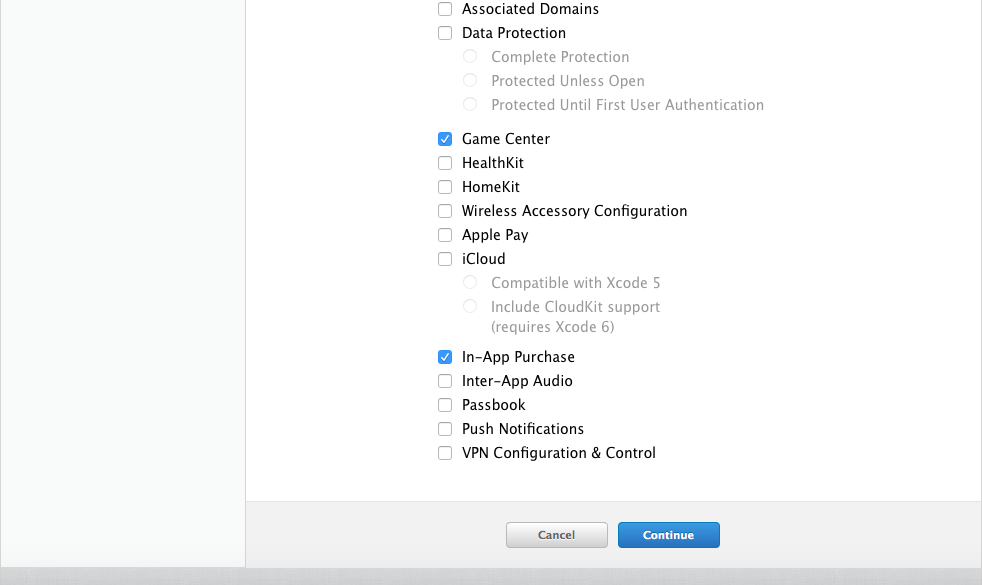
Select the appropriate option from the section below, and click [continue] to proceed to the end.
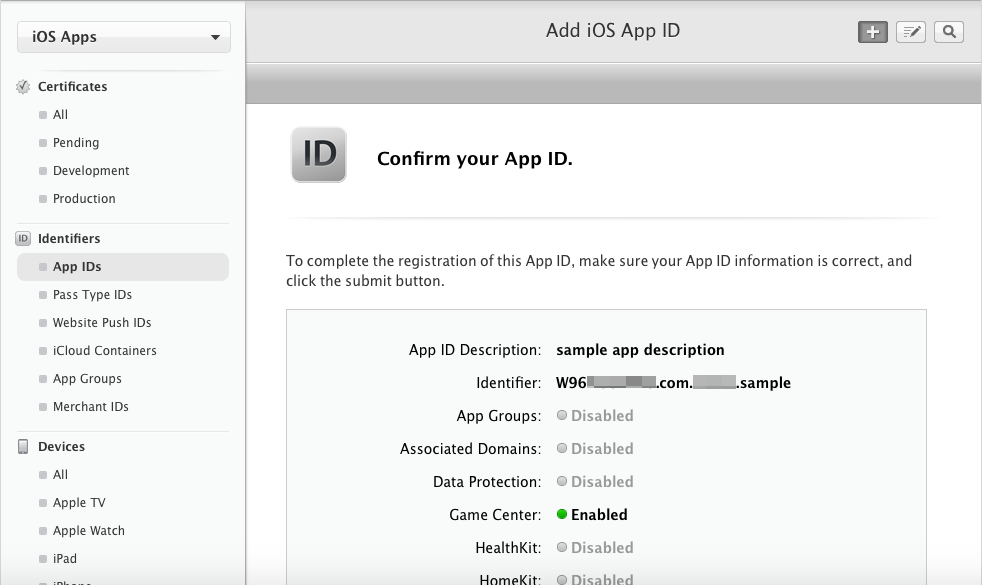
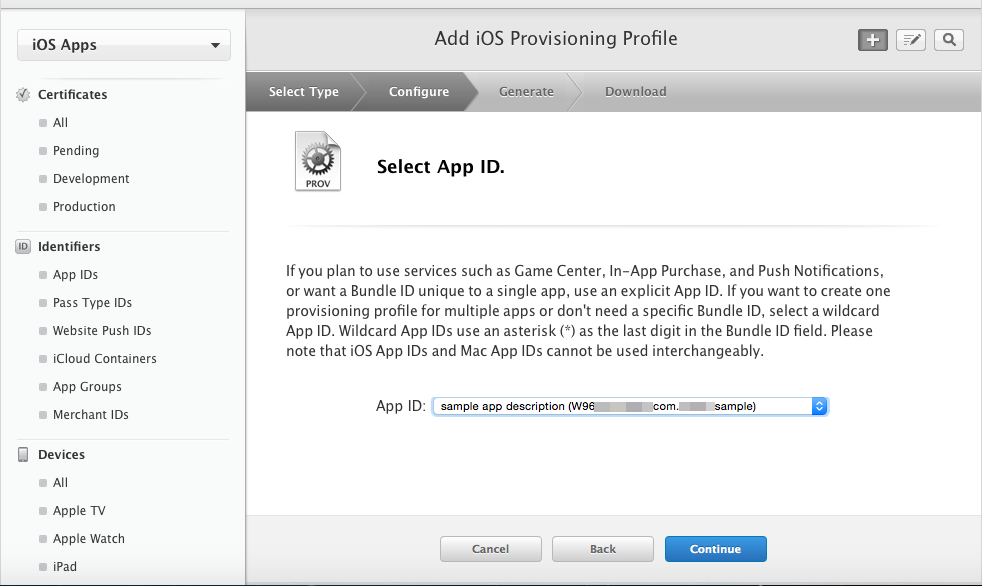
Your App ID has been created. There will be a prefix attached to the identifier (here it is W96~). You will need this for later so make a note of it somewhere.
4-2-3 Registering a Device
Let's register the UDID so that we can install to the device that you are using. You are able to register on the Apple Developer Program site.
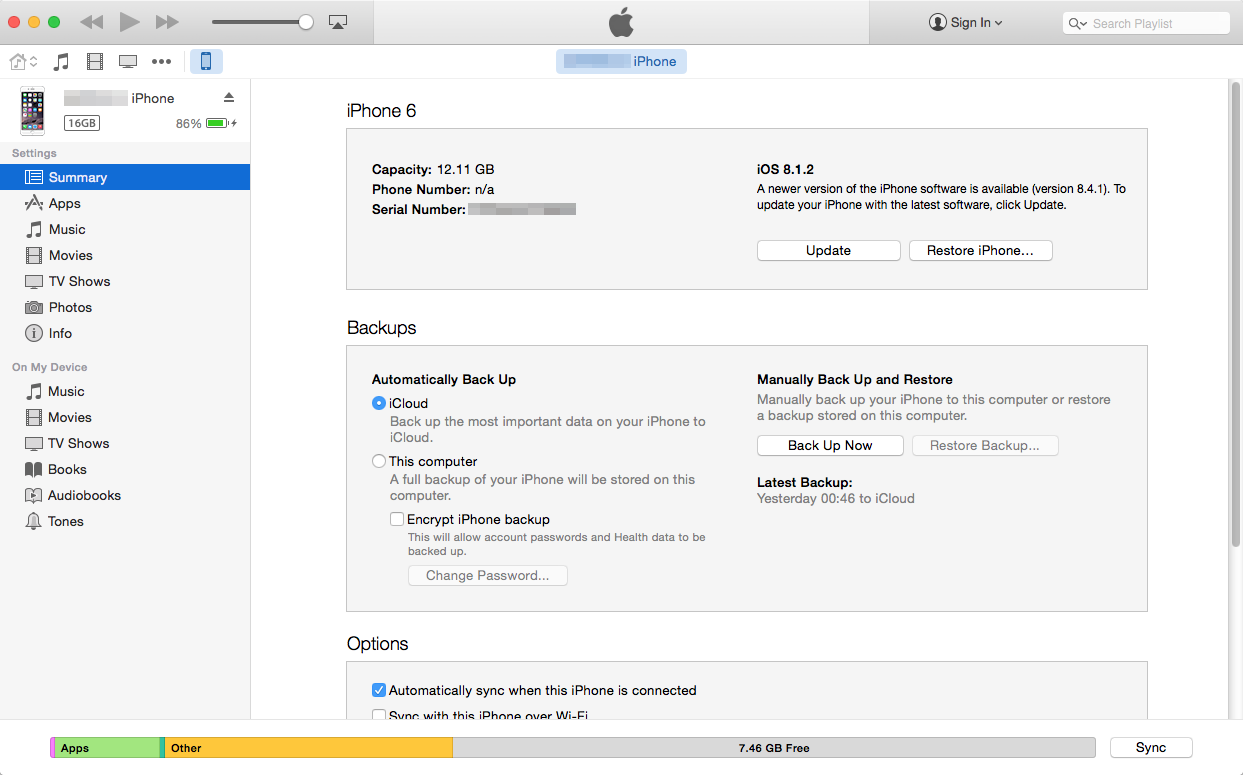
UDID is the unique serial number for each iOS device which can be checked using iTunes. Connect the device to your Mac and open up iTunes. In the device's overview, you can check the [Serial Number]. The UDID will be displayed by clicking this number. Copy the UDID by right-clicking.
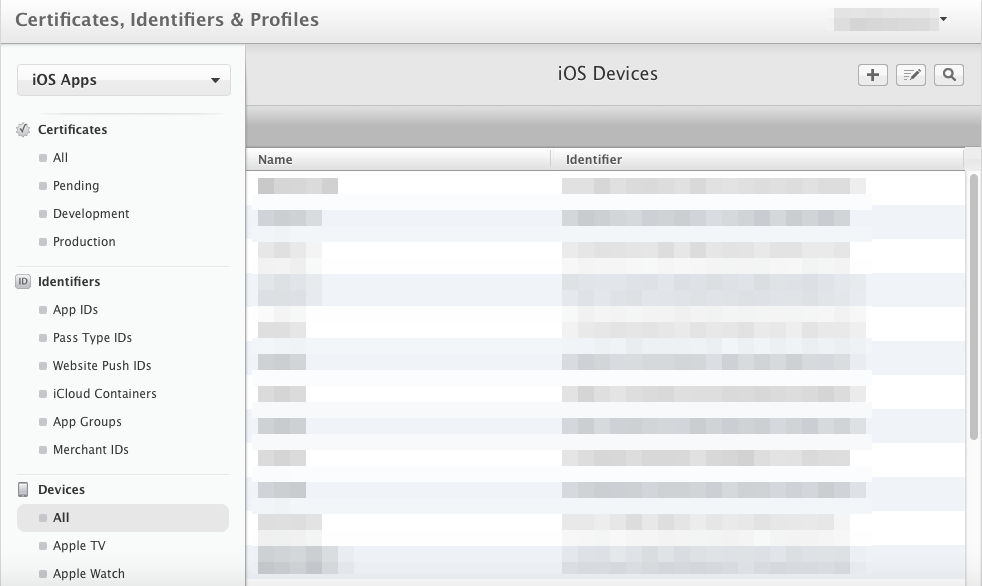
Select [All] under [Devices] in the left pane of Apple Developer Program, and click the [+] button at the top right.
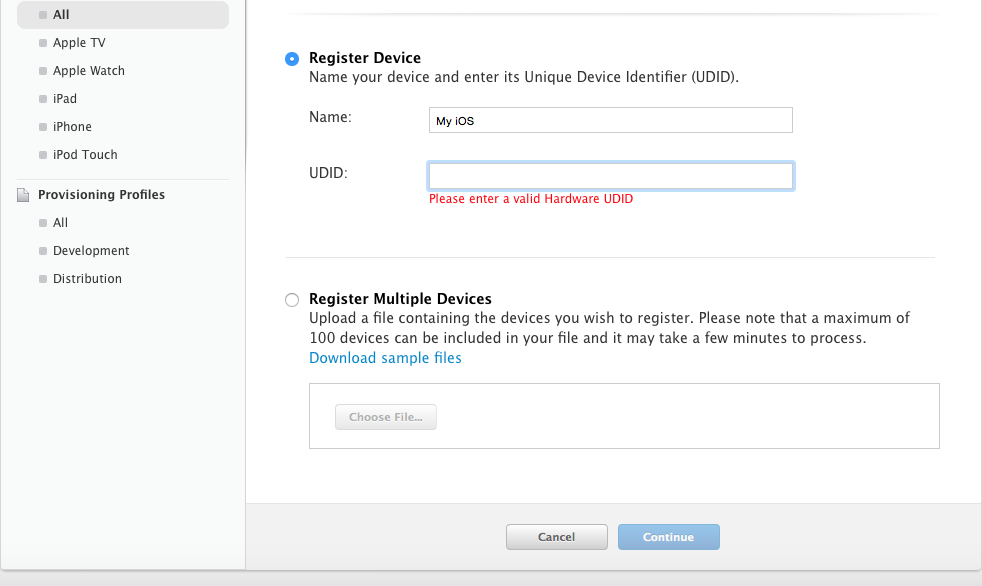
Enter a name that is easy to remember in the [Name] section, paste the [UDID] that was copied earlier. After doing so, click [Continue] then [Register] to register the device.
4-2-4 Creating and Registering a Provisioning Profile
Next, we will take care of some things on the Apple Developer Program site.
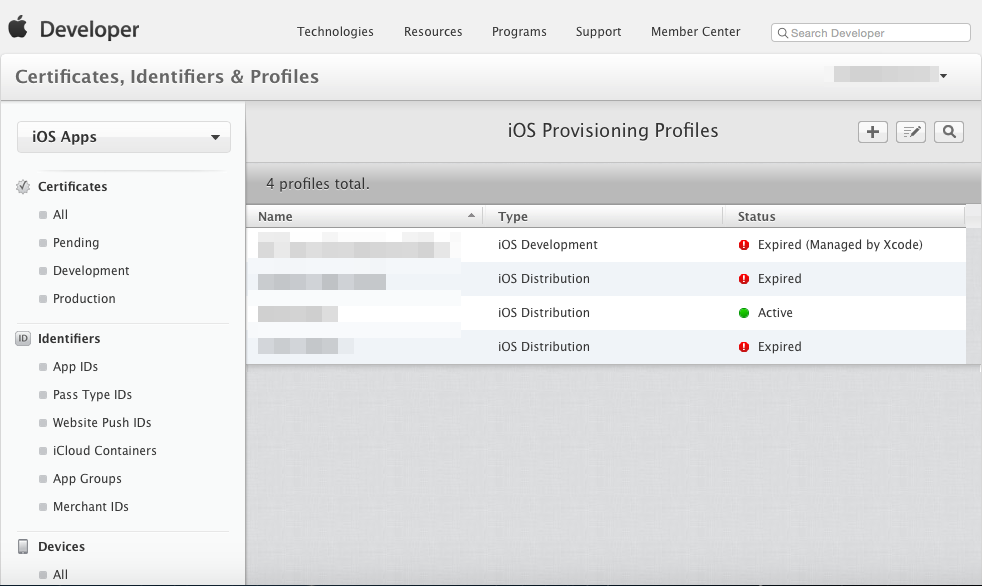
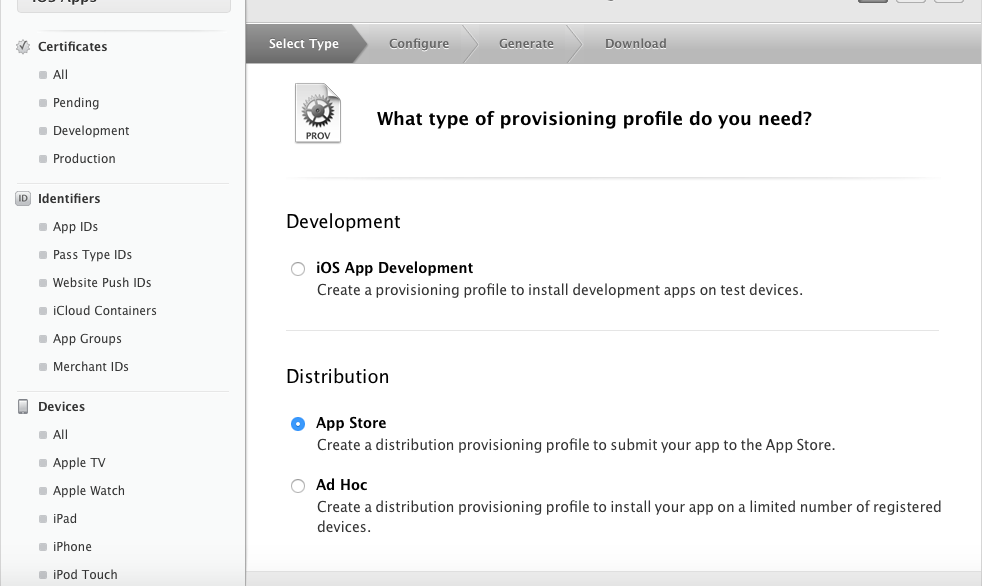
Select [All] under [Provisioning Profiles] in the left pane, and click the [+] button in the upper right.
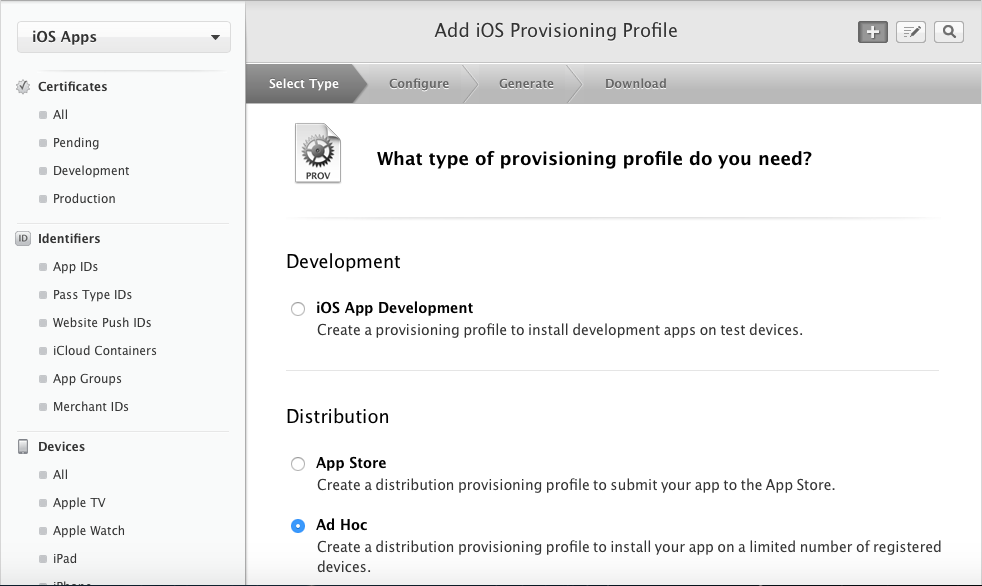
Select [Ad Hoc] under [Distribution] as the type.
Here we will use the [App ID] that we created earlier.
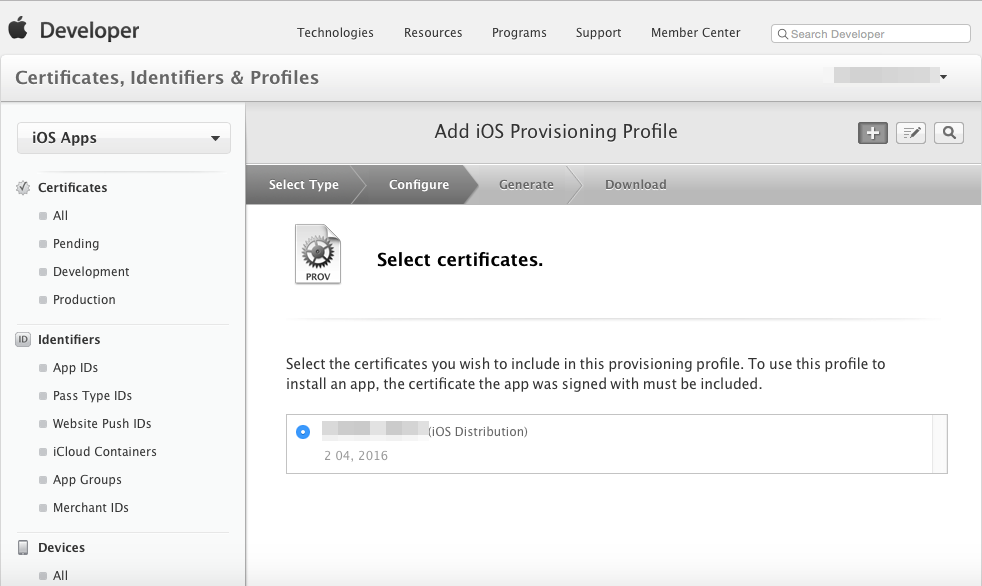
Select the certificate that we made back in 4-2-1.
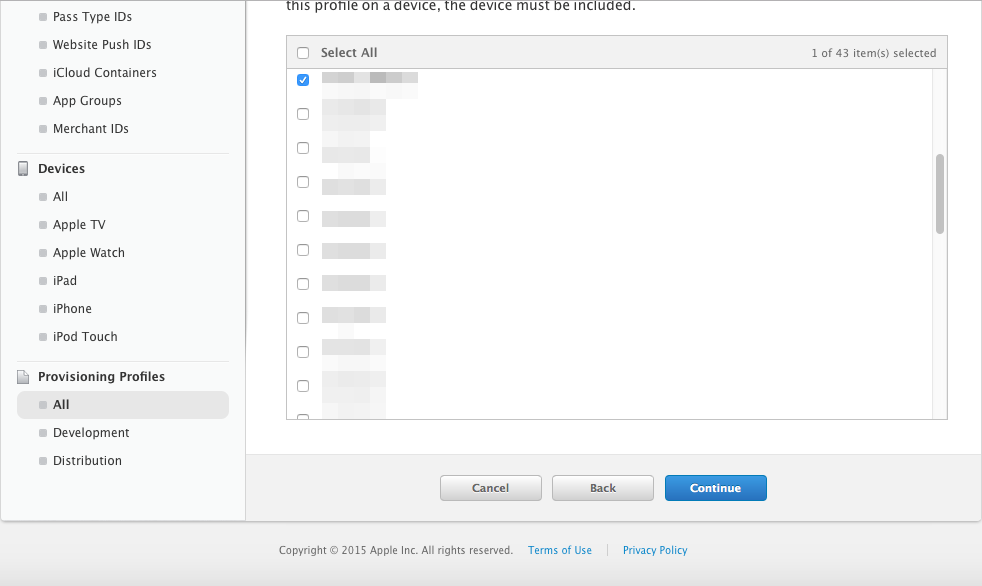
Similarly, we will set [Device] to the device which we added earlier.
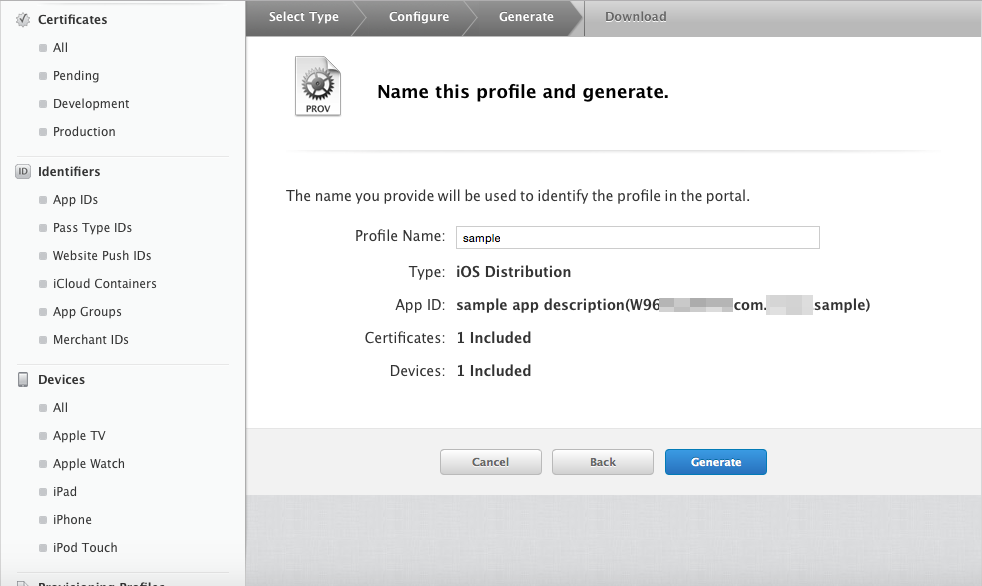
Enter a name that is easy to remember in the [Profile Name] section.
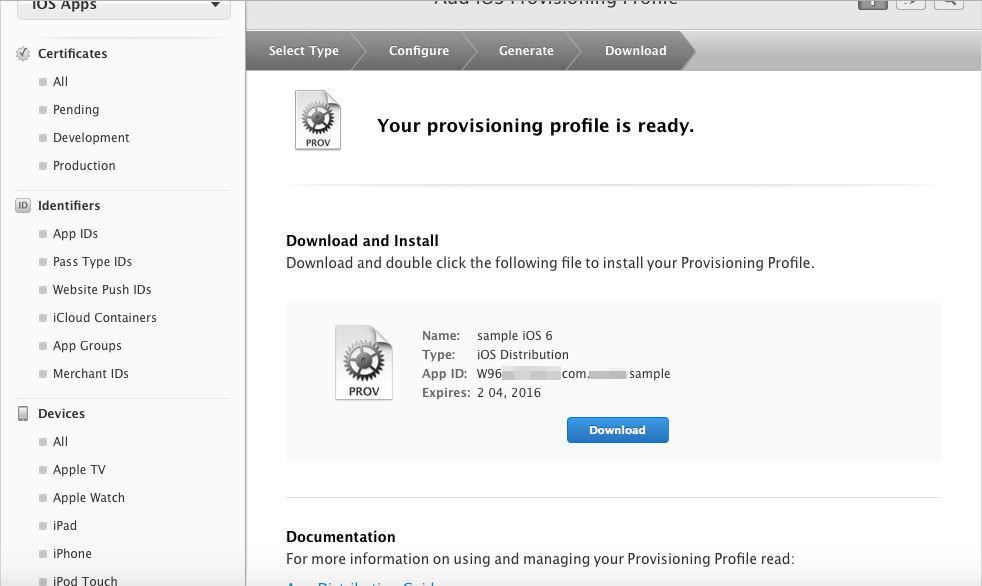
With this, you are good to go. Download the provisioning profile.
Double-clicking the provisioning file that you have downloaded will start the [iPhone Configuration Utility], and the provisioning file will be loaded.

4-3 Packaging to an ipa File
Let's create the ipa file which can be installed on to your device. Here we will create an ipa File which you can install on your iOS device.
4-3-1 Archive and Signing
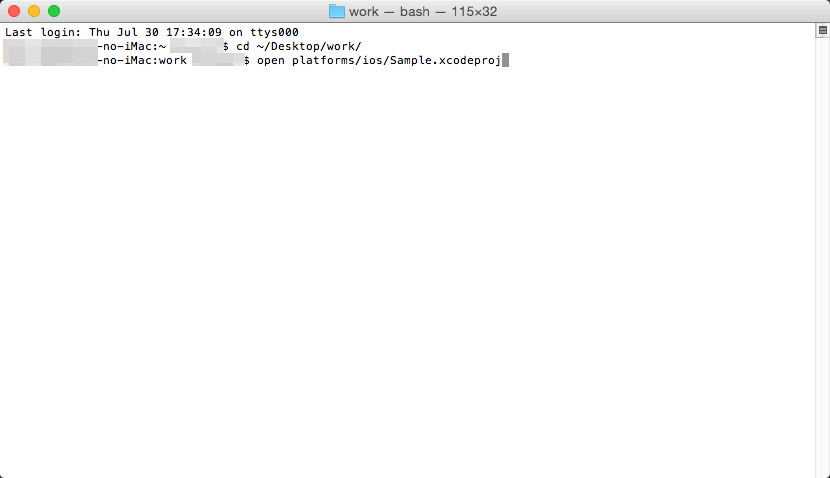
Open your work folder using the terminal. Enter "cd ~/Desktop/work" into the terminal and press the return key.
Open the xcodeproj file which was generated using Cordova in Xcode. Enter "open platforms/ios/Sample.xcodeproj" in the terminal and press the return key.
$ cd ~/Desktop/work
$ open platforms/ios/Sample.xcodeproj
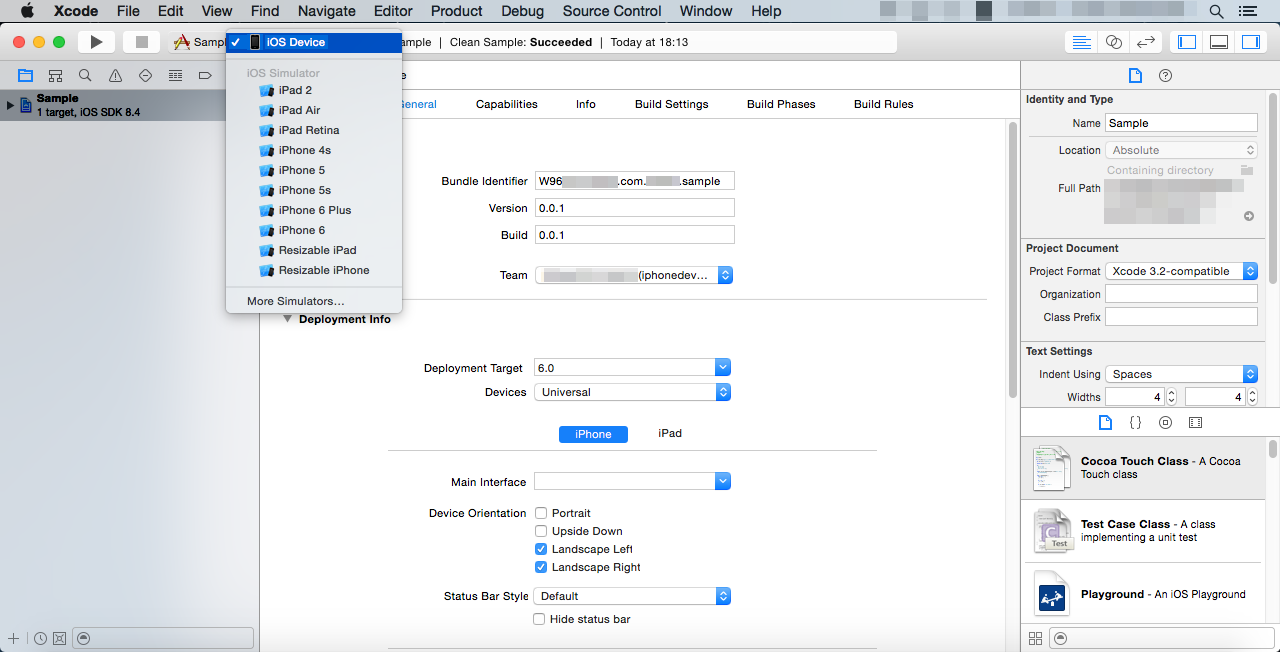
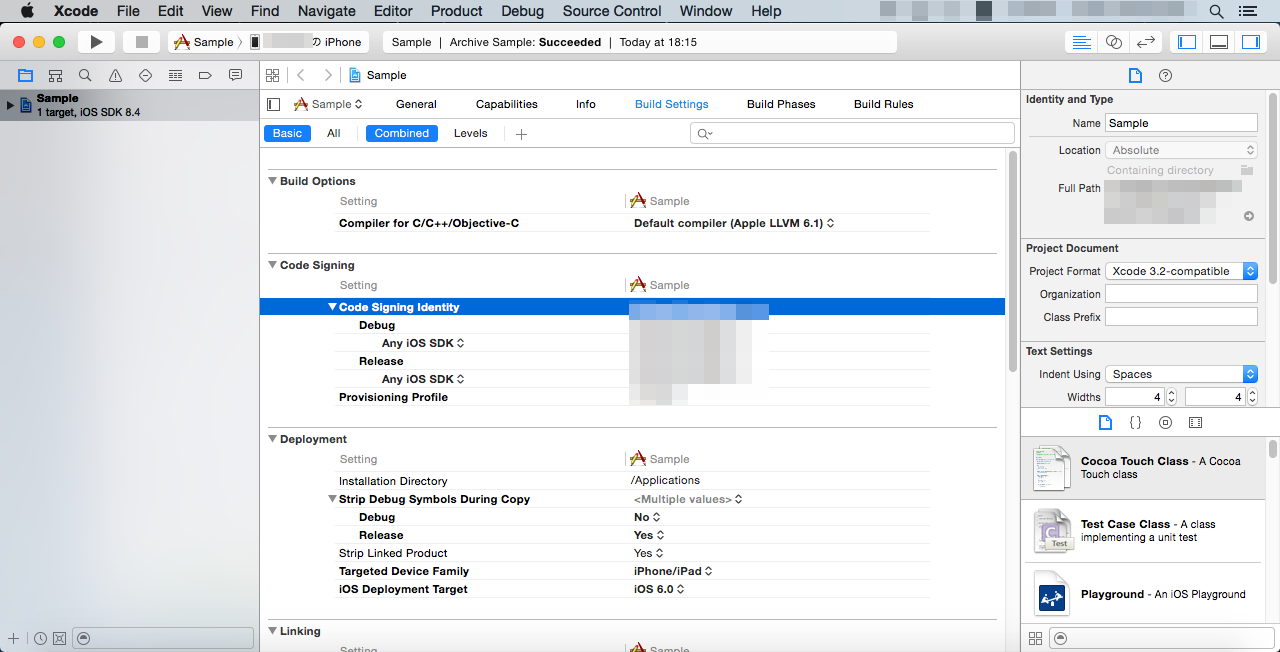
Xcode will start up. Select [Sample] in the left pane, and open the project settings. Set the target to "iOS Device" setting it up so that a build can be made for the device.
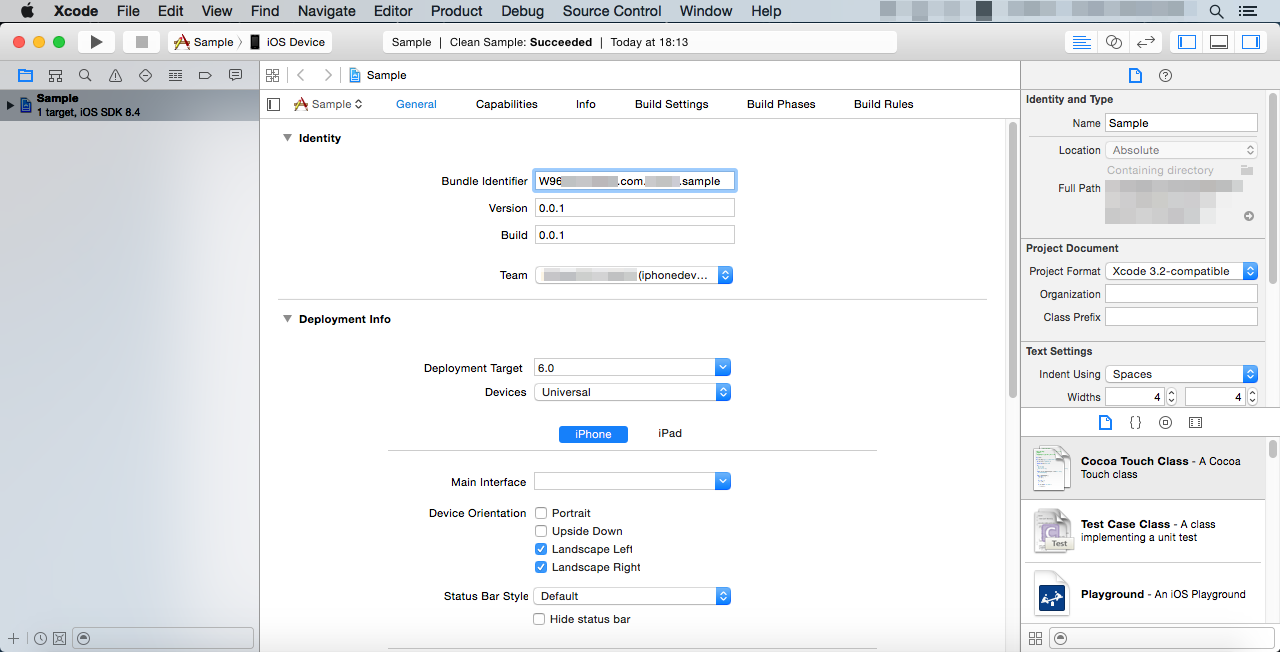
Use the same identifier set for the [App ID identifier] configured in 4-2-2 for the [Bundle Identifier].
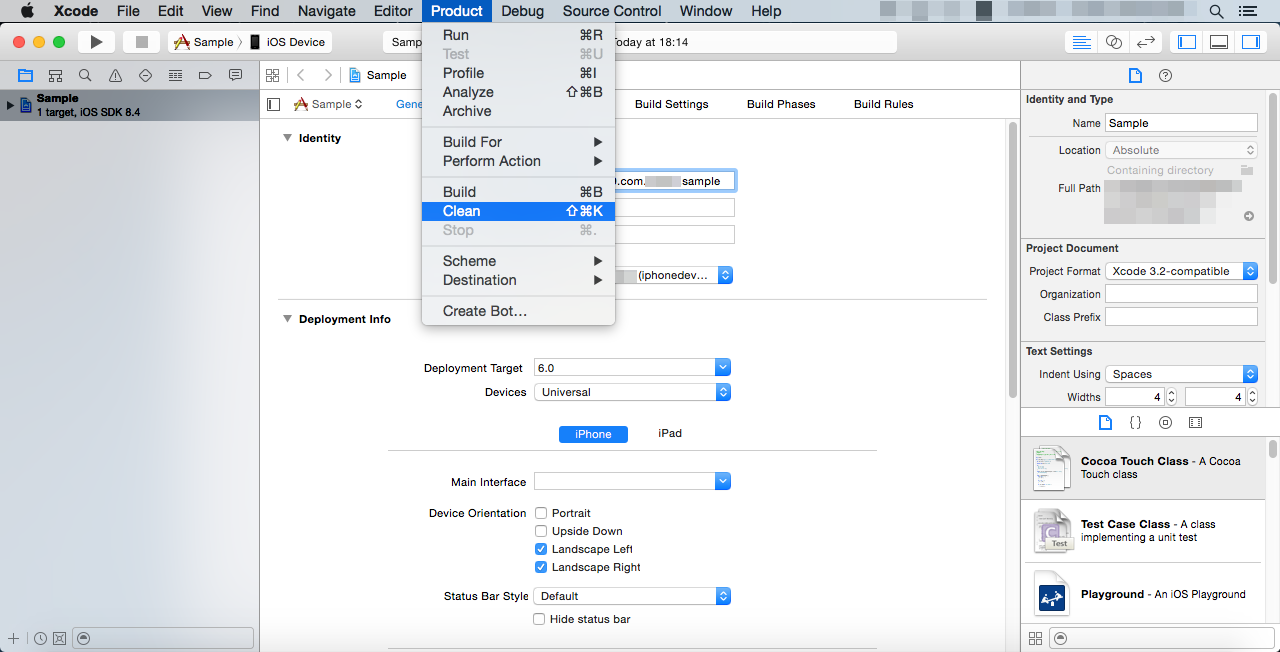
Just in case, let's make sure the project is clean. Select [Product] → [Clean] from the file menu.
Now let's create an archive to and gather all the files into one. Select [Product] → [Archive].
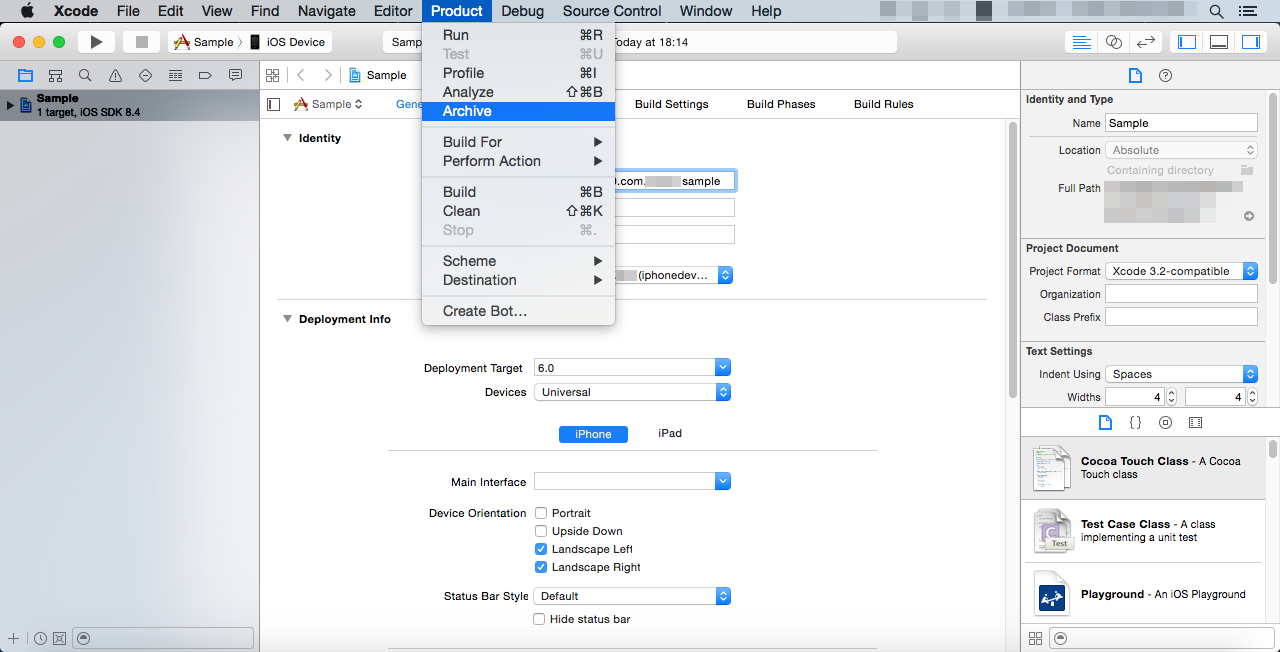
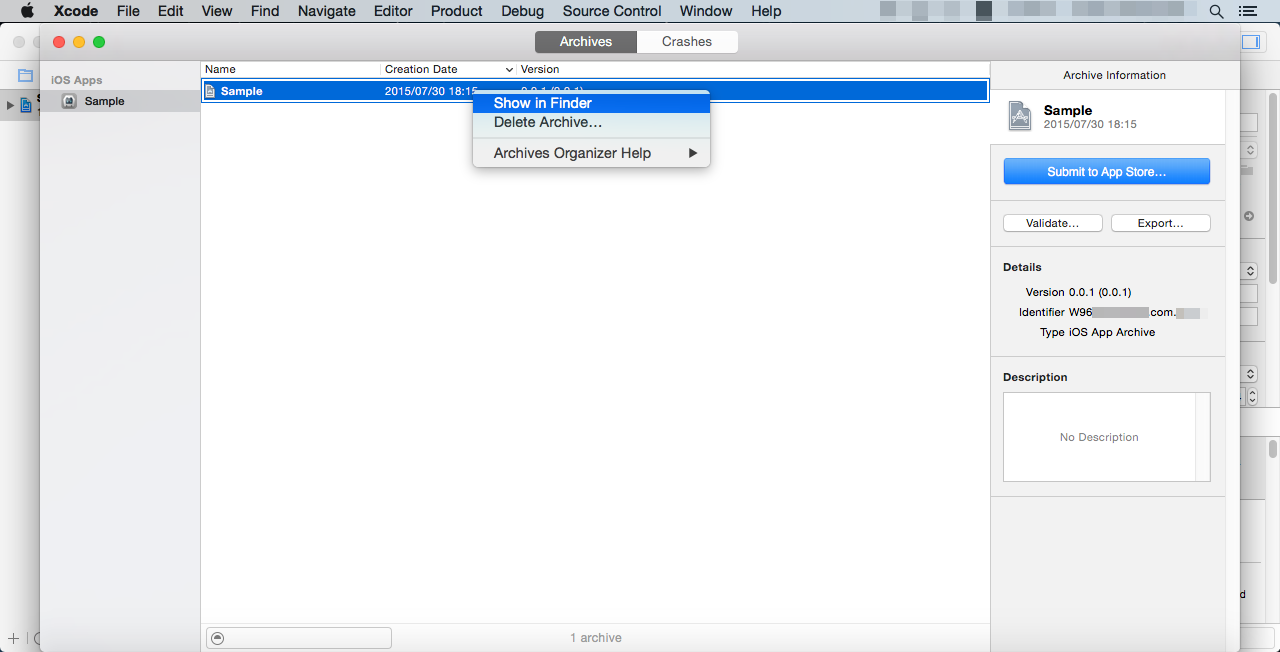
The Organizer window will open once the archive is successfully made, and the archive for this project will be displayed.

Right-click the archive and when you select [Show in Finder] you can open the location of the archive file in the Finder.
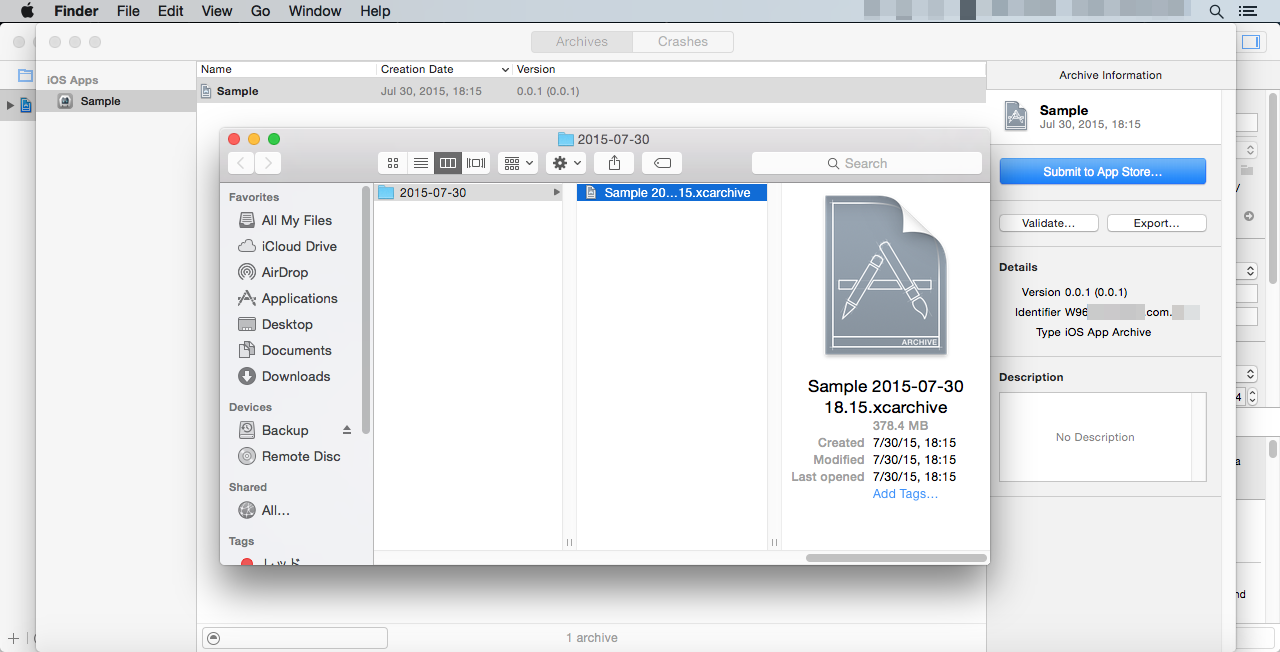
The archive will be located relatively deeply nested in folders at /Users/<User Name>/Library/Developer/Xcode/Archives/Date/
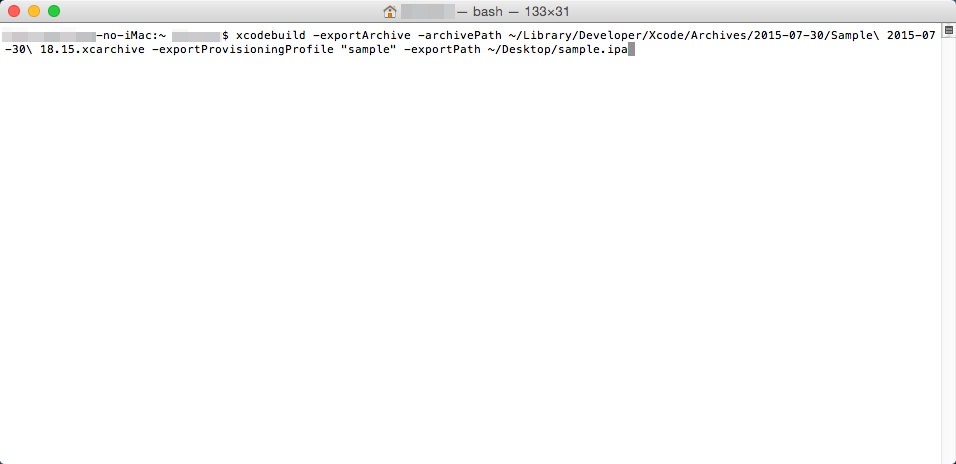
It's possible to also export the package as is using [Export...] in the right pane of the Organizer, but since we want to explicitly specify the provisioning profile, we will export from the terminal. We will use the "xcodebuild" command to export using the terminal.
Below is an example of a command.
将游戏打包成 iOS 程序
<创建 ipa 安装文件>
1 概述
从这个版本开始,使用RPG Maker MV做的游戏可以在那些支持HTML5(包括例如WebGL & 2DCanvas , WebAudio and JavaScript)的浏览器上直接运行。同时也支持在 iPhone和 iPad的 Safari 上玩这些游戏(Safari 支持HTML5)。
不过比起向大家解释如何在 Safari 上玩,我们更愿意在这一节说明如何把你的游戏打包成独立的 iOS 程序。在 iOS 设备上把一个HTML5游戏作为应用运行,和把它放在支持HTML5的浏览器里运行是很相似的。这种将一个web应用(HTML5游戏)以原生方式运行的程序被称作"Hybrid App",并且由于它的跨平台特性而变得越来越热门。
在浏览器内,可以处理显示与声音的内置"浏览器引擎"(UIWebView)会将游戏打包成应用。有数种作为应用与浏览器引擎连接的框架,但是我们今天将使用一个名为Apache Cordova的框架。
操作系统
用RPG Maker MV制作的游戏的确可以在数种不同的平台上作为hybier app运行,但是你必须有一台装有OS X的Mac 电脑才能创建 iOS 应用。我们将使用OS X 10.10作为示例。另外,用来执行这些工作的电脑以下将简称为"Mac"。
2 准备开发环境
需要创建一个 ipa 文件才能把用RPG Maker MV制作的游戏安装到 iOS 上,ipa 文件是 iOS 应用的安装包,其拓展名就是 ipa。这个文件是以ZIP格式压缩的包,内含应用运行所需要的多种文件。在这里我们把创建 ipa 的过程称作"打包"。
同时,你需要连接上互联网,以确保能够下载安装一些必要的开发工具。
2-1 Node.js 和 Apache Cordova 的安装和配置
简而言之,Node.js 提供了一个在浏览器外运行JavaScript的环境。Cordova 是Node.js 的一个包,所以我们先安装Node.js。
2-1-1 Node.js 的安装和检查
单击在https://nodejs.org/看到的[INSTALL]按钮以下载Node.js 的安装包。
运行安装包,当提示输入管理员密码的时候,输入密码然后继续运行。程序结束后安装也就完成了。
在终端确认Node.js 有没有成功安装。打开终端(应用 > 实用工具),输入"node -v"并回车。如果显示了你所安装的Node.js 的版本,说明安装成功了。
$ node -v
2-1-2 安装 Cordova
Cordova 是Node.js 的包。Node.js 内置了npm包管理器。
在终端里输入"sudo npm install cordova -g"即可安装 Cordova。"sudo"在Mac 下会以管理员权限执行其后的语句,这里是以管理员权限执行"npm"命令,"-g"指定可以在全局范围内使用 Cordova,也就是说,你就可以在任意文件夹内使用它。
执行该命令时,你需要输入管理员密码。
$ sudo npm install cordova -g
确认 Cordova 是否成功安装。在终端里执行"cordova -v"。如果显示了 Cordova 的版本,说明安装成功了。
$ cordova -v
2-2 Xcode的安装和设置
在你的 ipa 文件中有多种确保应用能在 iOS 设备上正常运行所必须的文件。Mac 上的Xcode即可完成将这些文件打包成一个 ipa 的工作。Xcode中也包含了允许你进行真正的开发工作所需要的工具。
2-2-1 安装、设置Xcode
你可以在 App Store中免费获取Xcode。
截止2015年八月,Xcode最新的版本号是6.4。
Xcode命令行工具是一系列可用在终端内协助开发的指令。
在[Xcode]菜单的[首选项]中,进入[位置],确保命令行工具是可用的。如果你现在并没有命令行工具,可以在左侧的[下载]中获取。
2-3 安装 ios-sim
我们即将安装 ios-sim,它允许你在 Cordova 中便捷地使用 iOS 模拟器。可以用Node.js 包管理器安装它。
在终端中运行"sudo npm install ios-sim -g"即可安装模拟器。
如果你运行"ios-sim --version"后显示了模拟器的版本,则说明安装没有问题。
$ sudo npm install ios-sim -g
$ ios-sim --version
3 用RPG Maker部署游戏
我们将从RPG Maker中导出必要的游戏数据、资源和游戏引擎。在文件菜单中选择[部署]即可呼出部署对话框。选择[Android / iOS]然后导出,所有必备的文件都会被导出到选择的文件夹里。
我们这里已导出到桌面为例。
4 打包
打包指创建能安装应用到 iOS 设备的 ipa 文件的过程。
4-1 新建Xcode项目
用 Cordova 创建一个Xcode项目。结束后,我们就可以用Xcode导出 ipa 文件。
4-1-1 创建 Cordova 模板
首先,我们使用 Cordova 命令中的"create"选项来创建一个模板。下面是你在终端中输入的命令的一个示例。
$ cordova create ~/Desktop/work com.example.sample Sample
在上面的示例中,我们在桌面上创建了一个待会将要用来工作的文件夹"work"。这个文件夹将会是模板,包的名字会被设置为"com.example.sample"而应用名将为"Sample"。
*当真正设置包名的时候,你不能用"com.example"。
4-1-2 添加 iOS 平台
用 Cordova 向模板中添加 iOS 文件。在终端输入"cd ~/Desktop/work" 以便转移到之前创建的"work"文件夹下。然后输入"cordova platform add ios"并回车。这样就添加了让应用在 iOS 上运行所必备的文件。
$ cd ~/Desktop/work
$ cordova platform add ios
使用 ios-sim给你提供的 iOS 模拟器来确认目前为止你所做的都没有问题。
在终端中运行"cordova emulate ios",当build完成的时候,iOS 模拟器会自动运行,并且展示模板界面。
$ cordova emulate ios
4-1-3 复制已部署的游戏文件
我们要把之前部署的游戏资源复制到"work"文件夹下的"www"中。首先把"wrok/www"中原有的一切文件都删掉,留空。
把之前部署游戏时导出的文件夹下的"www"文件夹中的所有内容复制到"work/www"中。
4-1-4 编辑 index.html
调整一下游戏的HTML以适配 Cordova。
用任意文本编辑器打开"work/www/index.html"
你只需要把下面这行加到<body style="background-color: black">下面就行了。
<script type="text/javascript" src="cordova.js"></script>
4-1-5 编辑 config.xml
调整一下 config.xml,这个文件配置了游戏应用的行为。RPG Maker的最优化设计是将设备横向使用,所以我们把屏幕朝向改为横向。
编辑"work/config.xml"。
在<platform name ="ios">里面加入下述内容。
<preference name="orientation" value="landscape" />
另外,有这样的一行:<access origin="*">,它允许从游戏的HTML中访问外部的HTML。
我们不需要这样,所以把这行删掉。
4-1-6 Build
我们已经完成了配置,现在可以生成build了。
在终端里运行"cordova build"等待一段时间,build就完成了。
$ cordova build
现在,让你的游戏能正常运行所需要的所有设置都完成了。用模拟器检验 app能否正常工作。
运行"cordova emulate ios"。
$ cordova emulate ios
游戏启动了。
4-1-7 更改图标
游戏图标在"work/platforms/ios/<App Name>/Resources/icons"里。
如果你想自定义图标,用和原来文件同样大小同样名字的文件去覆盖它。
4-2 创建配置文件(Provisioning Profile)
想要创建一个真正能在 iOS 设备上安装应用的 ipa 文件,你需要一个"provisioning profile",它是用来验证应用的。
想要获得provisioning profile,你需要在 Apple的[Apple Developer Program]注册(收费)。
同时,我们把一系列比如把provisioning file应用于打包的过程称作"signing"(签名)。你需要一些密钥和验证密钥的证书之类的文件才能签名。
* Apple Developer Program 网站更新频繁,获取provisioning files 的方法可能有改变。如果你在执行必须操作时遇到了困难或者想要了解相关的事情,请咨询Apple Developer Program。
4-2-1 创建密钥及请求并注册证书
如果你以前没有注册过证书,那么请看下去。
首先,我们要创建一个密钥,然后为这个密钥请求证书。我们将使用"Keychain Access"请求证书。
Keychain Access 在[应用] → [实用工具]里。
运行Keychain Access,在[Keychain Access]菜单中的[证书助手]下选择[从证书机构请求一个证书]。
用你注册 Apple Developer Program时使用的邮件地址填写信息,然后选择一个易于理解的名字。在之后选择[保存到硬盘]并选中[让我自己指定密钥对信息]。
保存请求文件。
在 Apple Developer Program选择[Certificates , Identifiers & Profiles]。
当你选择[Certificates]后,你会跳转到证书管理界面。在左侧面板里选择[All]然后在右上角点击[+]。
选择[App Store and Ad Hoc]。
继续到下一个界面。
在选择请求证书界面,选择之前用Keychain Access 产生的请求文件。
现在证书已经发布了,将证书下载下来。
双击下载下来的证书即可把它加载进Keychain Access。
4-2-2 创建 App ID
现在,我们要创建一个打包时会用到的 App ID。
在 Apple Developer Program中的[Identifiers]里面进行此项工作。
在左侧面板[Identifiers]下选择[App IDs],然后点击右上角的[+]。
在[App ID Description]中的[Name]里选择一个易于记忆的名字。
在[App ID Suffix]下的[Explicit App ID]中输入[Bundle ID]。就如之前提供的范例一样,域名要反向输入,用顶级域起头(范例中是"com")并用"."连接,最后是你游戏的名字(范例中是"sample")。
*注意,你不能真的用example.com这个域。
示例:
当你自己的域名是[example.com]而你的游戏是[sample],你就写:
com.example.sample。
在下面的选项里面选择合适的项,然后点击[continue]。
现在你的 App ID已经创建好了。在验证器前面会有一个前缀(这里是W96~)。你之后会用到它,所以现在先把它记下来。
4-2-3 注册一个设备
现在注册一个UDID,以便于能够把应用安装到你在使用的设备上。同样在 Apple Developer Program注册。
UDID是每个 iOS 设备所独有的序列号,可以在 iTunes 上查到。把你的设备连接到Mac 然后打开 iTunes。在设备摘要里面可以查到[序列号]。点击这个序列号就可以看到UDID。右键这个UDID即可复制它。
在 Apple Developer Program左侧面板中的[Devices]里选择[All],然后单击右上角的[+]。
在[Name]里输入一个便于记忆的名字,把[UDID]粘贴到对应的地方。之后点击[Continue]再[Register]即可注册设备。
4-2-4 创建和注册供应配置文件
接着,我们再处理 Apple Developer Program上的一些事情。
选择左侧列表[Provisioning Profiles]下的[All],然后点击右上角的[+]。
选择[Distribution]下的[Ad Hoc]作为类型。
这里我们会用到之前创建的[App ID]。
选择我们在4-2-1里创建好的证书。
类似的,把[Device]设置成之前添加的设备。
在[Profile Name]为配置文件取一个好记的名字。
下载刚才创建的配置文件。有了这个,你就可以安心地继续了。
双击刚才下载的配置文件会启动[iPhone Configuration Utility]并加载这个文件。
4-3 打包到 ipa 文件
现在来创建可以安装到设备上的 ipa 文件。这里以适用于 iOS 设备的 ipa 文件为例。
4-3-1 归档和签名
在终端中打开你的文件夹:输入 "cd ~/Desktop/work" 并回车。
打开Xcode中创建的xcodeproj文件:输入 "open platforms/ios/Sample.xcodeproj" 并回车。
$ cd ~/Desktop/work
$ open platforms/ios/Sample.xcodeproj
Xcode会启动。在左侧面板中选择[Sample],然后打开工程设置。把目标设置为 "iOS Device" 以便适配 iOS 设备。
使用之前在 4-2-2 里为了[Bundle Identifier]而配置的那个[App ID identifier]。
以防万一,确保工程文件夹是干净的:选择菜单里的[Product] → [Clean]。
现在来创建归档,把所有文件打包到一个文件里。选择[Product] → [Archive]。
等待归档完成,会出现Organizer窗口并显示归档文件。
右键归档文件,选择[Show in Finder]以便在Finder里面打开它的位置。
归档文件位于 /Users/<User Name>/Library/Developer/Xcode/Archives/Date/ 。
可以在Organizer窗口中选择右侧的[Export...]来导出包,但是既然我们希望显式地指定其使用的配置文件,我们会通过终端来导出。我们需要使用 "xcodebuild" 命令。
下面是一个示例。
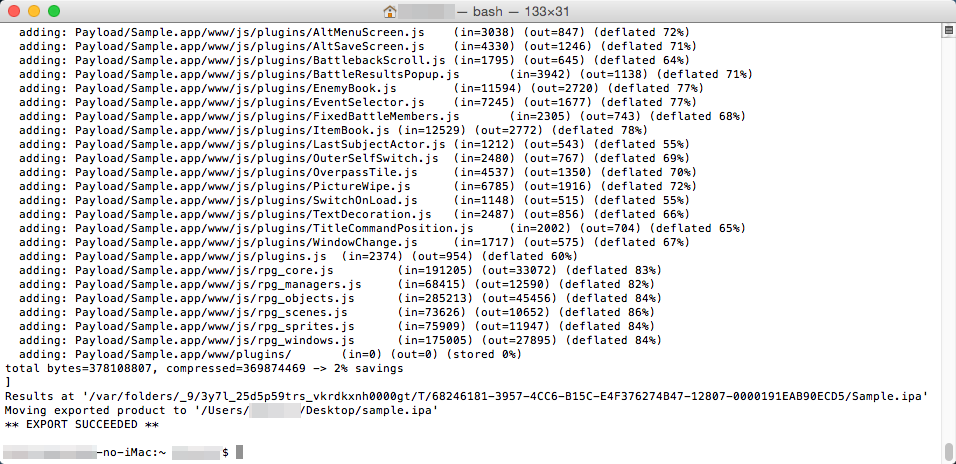
$ xcodebuild -exportArchive -archivePath ~/Library/Developer/Xcode/Archives/2015-07-29/Sample\ 2015-07-29\ 18.32.xcarchive/ -exportProvisioningProfile "sample" -exportPath ~/Desktop/sample.ipa
我们通过"exportArchive"选项来把归档文件导出到 ipa 文件。
"archivePath"选项指定之前创建的归档文件。
"exportProvisioningProfile"选项指定了配置文件。这个配置文件就是之前在 4-2-4 中通过 iPhone Configuration Utility注册的。注意把具体的文件名和路径用双引号括起来。
"exportPath"指定了 ipa 文件的导出路径。这个例子中我们把 sample.ipa 导出到桌面。
当"EXPORT SUCCEEDED"出现时,导出已经成功完成,经过签名的 ipa 文件已经被导出了。
4-4 安装到设备
我们通过 iTunes 把应用安装到设备上。
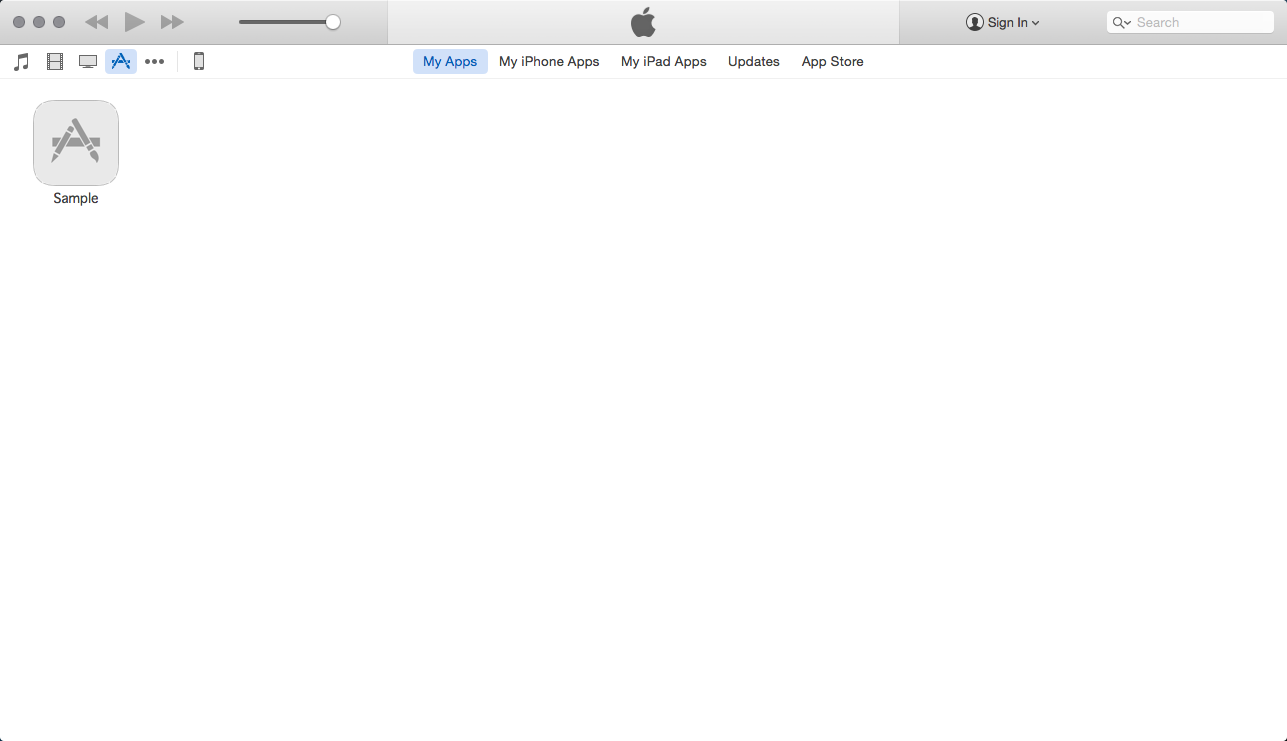
用数据线连接 iOS 设备和Mac 并启动 iTunes。把 ipa 文件拖拽至[My Apps]列表中。
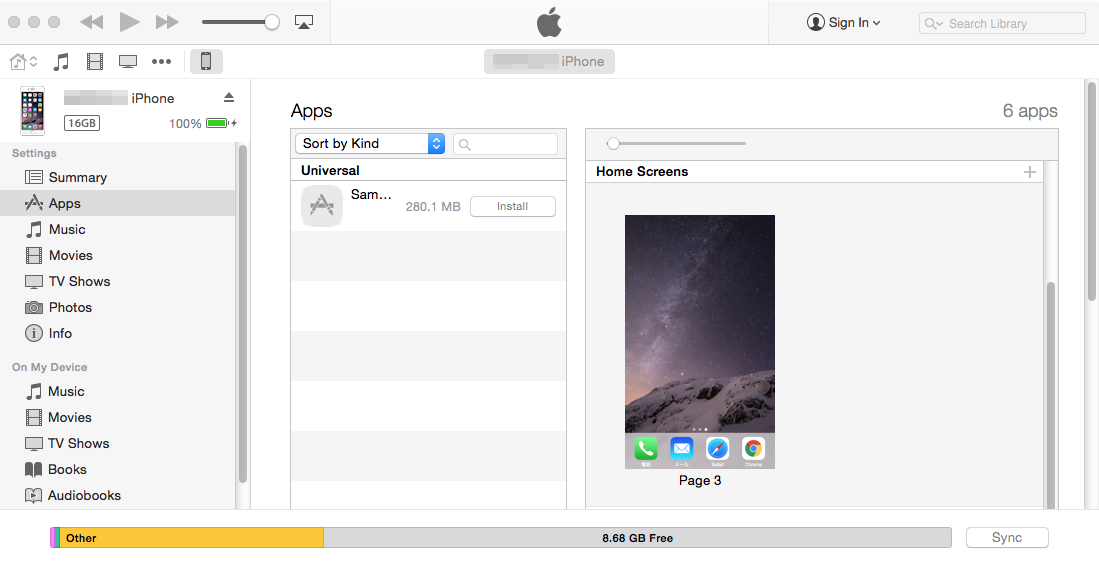
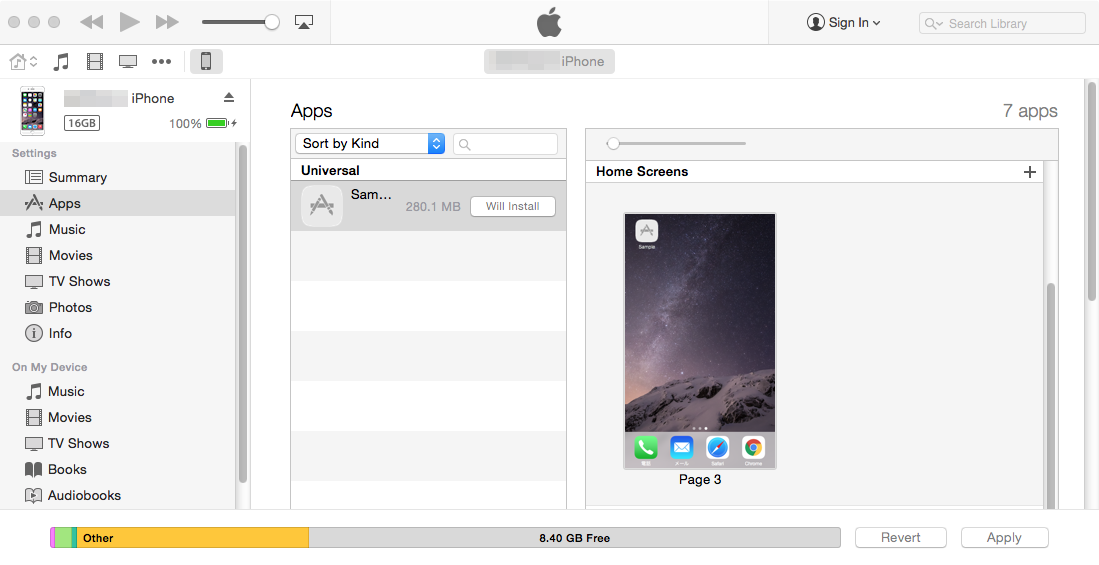
打开设备的应用设置。当你把你的应用拖拽到右侧的主屏幕上,并按下[Apply]按钮时,它会自动进行安装。
*你无法把这个应用安装到你在 4-2-4 中添加的设备以外的设备上。
5 发布到 App Store
你需要一个用于 App Store的配置文件才能把游戏发布到 App Store。
选择[App Store]作为配置文件的类型。
用Xcode来审查 App Store上的应用相当方便。在归档前,进一步设置一下配置文件。在工程设置下的[Build Setting]中找到[Code Signing]。
可以在Organizer窗口中右侧的[Submit to App Store]来提交工程文件。
*你需要自己的原创图标、启动画面、预览图等等。更详细的信息请查阅相关的资料。
请注意
- 我们不对由于更改环境设置和使用终端命令而在您的Mac 上引起的任何问题负责。
- 我们不保证您通过这里介绍的方法开发的所有游戏应用都能在 App Store上架。
- 该信息创作于2015年八月。由于该过程使用的软件持续更新,此处展示的某些图片可能和实际有区别。
- 有关[发布到 App Store],如果您希望了解更多,请查看 Apple Developer Support上的[App Review]。
- 此处提及的第三方工具不在我们提供的支持服务范围内。